728x90

In this article, I’ll show you how to use the SCCM feature update option to perform a Windows 10 22H2 upgrade. We will use Windows Servicing in SCCM to upgrade Windows 10 devices to version 22H2 via the enablement package.

Windows 10, version 22H2, also known as the Windows 10 2022 Update, is available for eligible devices running Windows 10, versions 20H2 and newer. Microsoft released Windows 10, version 22H2 (KB5015684) on 18th October 2022, and it is an enablement package.

For home users running Windows 10 version 20H2 and later, the recommended way to get the Windows 10 22H2 is via Windows Update. Go to Start > Settings > Windows Update and run Check for Updates. Select the Feature update to Windows 10, version 22H2 and install it.

When you want to upgrade multiple Windows 10 devices to version 22H2, Configuration Manager is the best tool. It simplifies the way you deploy and manage updates and saves a lot of time. With Configuration Manager, you can select the “Feature Update to Windows 10 Version 22H2 via Enablement Package” and deploy it to a set of devices.

Ways to upgrade to Windows 10 22H2

There are multiple ways that you can use to upgrade to Windows 10 version 22H2.

  • Get the Windows 10 22H2 update via Windows Update.
  • Use Servicing Plans to upgrade eligible Windows 10 devices to version 22H2.
  • Upgrade Windows 10 21H2 to Windows 10 22H2 using ConfigMgr Windows Servicing feature.
  • Deploy the Windows 10 22H2 update using the SCCM task sequence.
  • Using the Intune to upgrade to Windows 10 22H2 upgrade for WUfB managed devices.

We will use the Configuration Manager feature update option to deploy the Windows 10 22H2 enablement package out of all the above methods. This is the easiest and quickest way I can think of to update Windows 10 to version 22H2.

Recommended: Upgrade to Windows 10 21H2 using SCCM | ConfigMgr

Can I use SCCM Servicing Plans to Upgrade to Windows 10 version 22H2?

Yes, you can use the Servicing Plans in SCCM to upgrade the computers running Windows 10 to version 22H2. With Configuration manager servicing plans you can ensure that all the Windows 10 systems are kept up-to-date when new builds are released. Servicing plans are ADR that can help you to upgrade Windows 10 to version 22H2. Take a look at detailed guide on Windows 10 Servicing Plans in SCCM.

If you are unsure whether to upgrade to Windows 10 22H2 using a Servicing Plan or a feature update deployment, I would advise choosing the latter. There are only a few steps involved in deploying a Windows 10 22H2 feature update, making it much simpler than a servicing plan. You get to make the final decision.

Related Article: Windows 11 22H2 upgrade using SCCM | ConfigMgr

About Windows 10 version 22H2

Windows 10 22H2 is an enablement package and this is good news for admins. The enablement package is a great option for installing a scoped feature update like Windows 10, version 22H2. You can upgrade from version 2004, 20H2, 21H1, or 21H2 to version 22H2 with a single restart, reducing update downtime. Since Windows 10 22H2 is an enablement package, the devices currently on Windows 10, version 20H2 or newer will have a fast installation experience because the update will install like a monthly update.

Prerequisites

With Configuration Manager, you need few things to be configured before you deploy the feature updates to computers. If you have deployed the feature updates before, it means most of the prerequisites are already taken care of. If your SCCM setup is new, you may have to configure them once before deploying the upgrades.

Listed below are all the prerequisites required for Windows 10 22H2 upgrade using SCCM.

Download Windows 10 22H2 Enablement Package

Let’s look at steps for downloading Windows 10 22H2 enablement package using SCCM. First of all ensure you have synchronized the updates in Configuration Manager. You can either download the feature first and deploy or directly deploy the feature update. I prefer to download it first, let the content get distributed to distribution points and then deploy it.

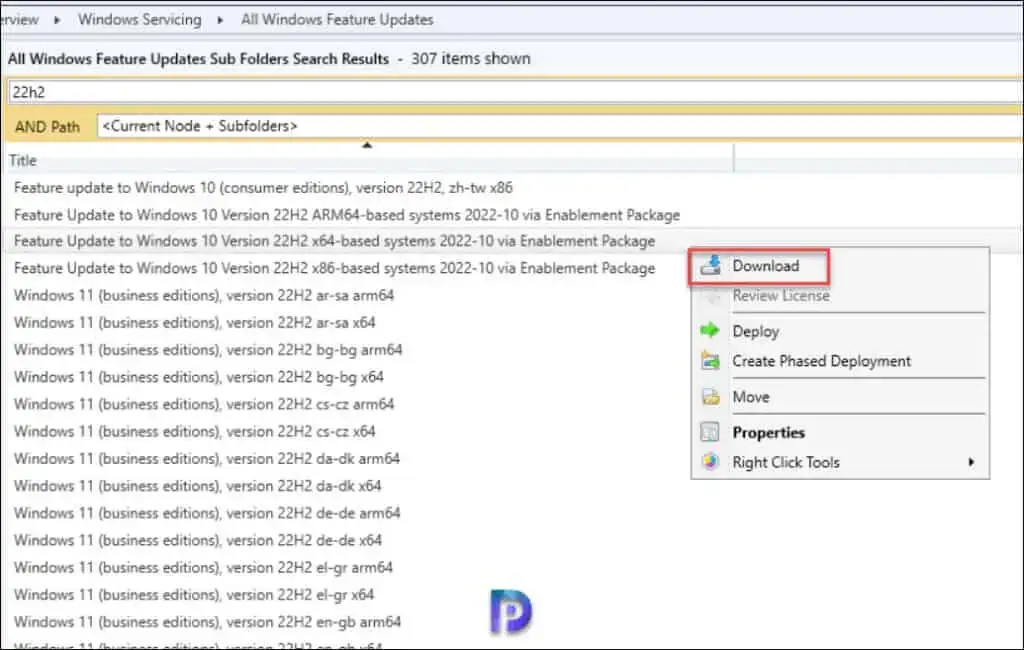
Go to Software Library > Overview > Windows 10 Servicing > All Windows 10 Updates. Look for the update “Feature Update to Windows 10 Version 22H2 x64-based systems 2022-10 via Enablement Package“. You can also search the updates with article ID 5015684.

Download Windows 10 22H2 Enablement Package

If you have got both x64-based systems and x86-based systems, you must download Feature Update to Windows 10 Version 22H2 x64-based and x86-based. In my lab, all my Windows 10 VMs are running Windows 10 64-bit OS, and therefore I am going to download only Feature Update to Windows 10 Version 22H2 x64-based systems 2022-10 via Enablement Package.

Create Deployment Package

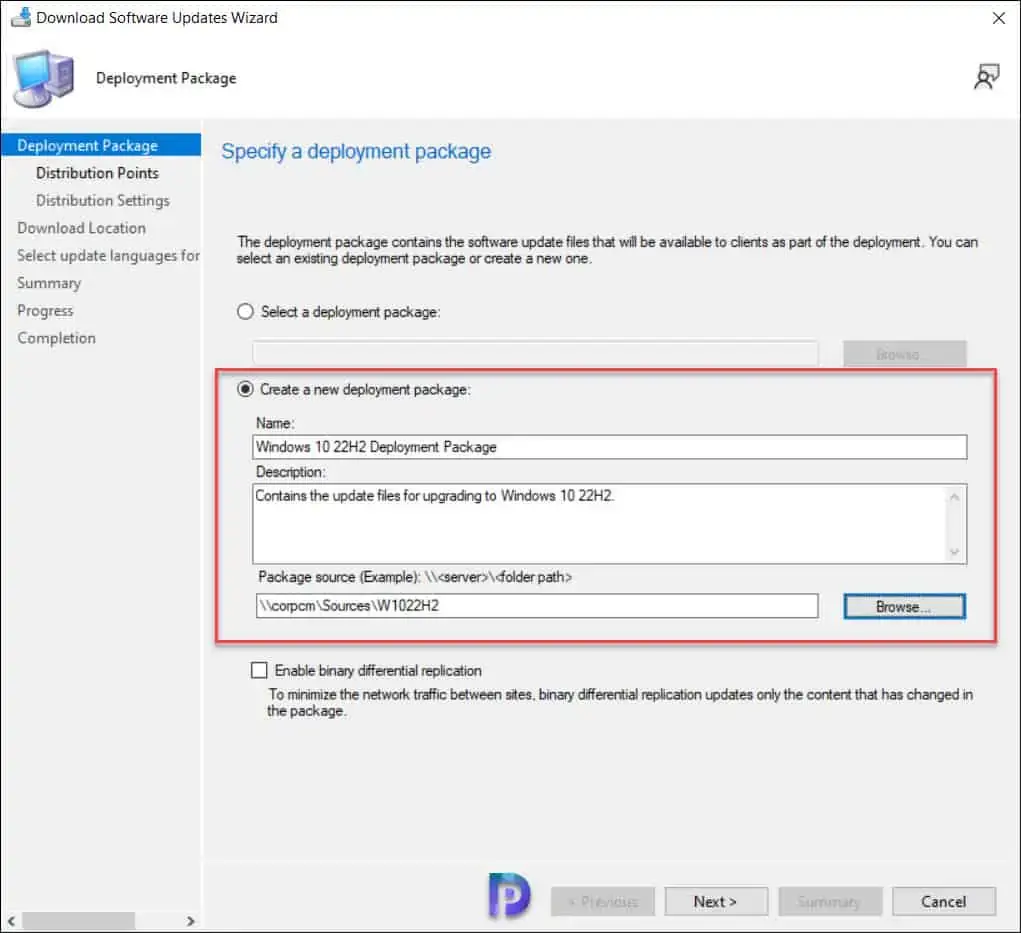
On the Deployment package window, specify the deployment package for Windows 10 22H2 upgrade files. This deployment package that you create will contain the software update files that will be deployed to the clients.

Select Create a new deployment package and specify the package name as “Windows 10 22H2 Deployment Package.” Add a brief description and specify the package source – a shared folder where you want to download the updates. Enabling the binary differential replication is optional. Click Next.

Download Windows 10 22H2 Enablement Package

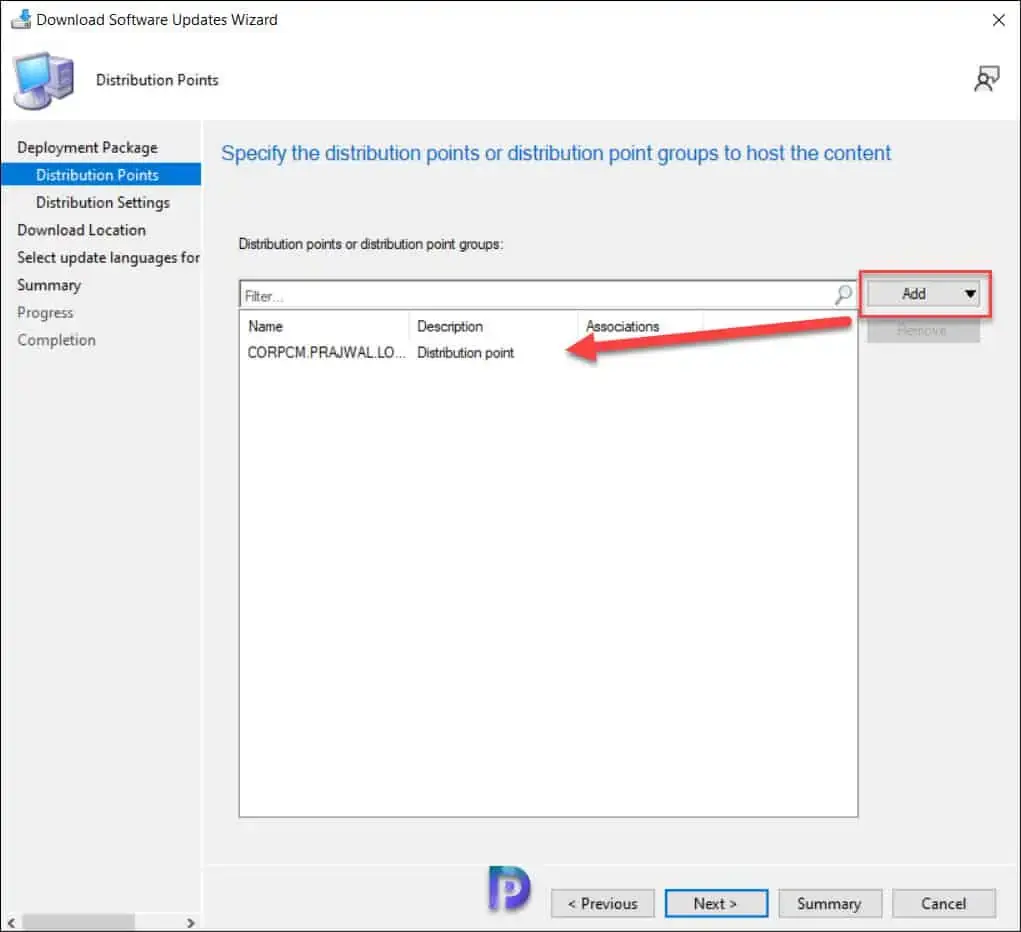
Click on Add button and select the distribution point servers to which you would like to distribute the Windows 10 22H2 upgrade files. Click Next.

Download Windows 10 22H2 Enablement Package

On the Distribution Settings page, you can specify the general distribution settings for the deployment package. Click Next.

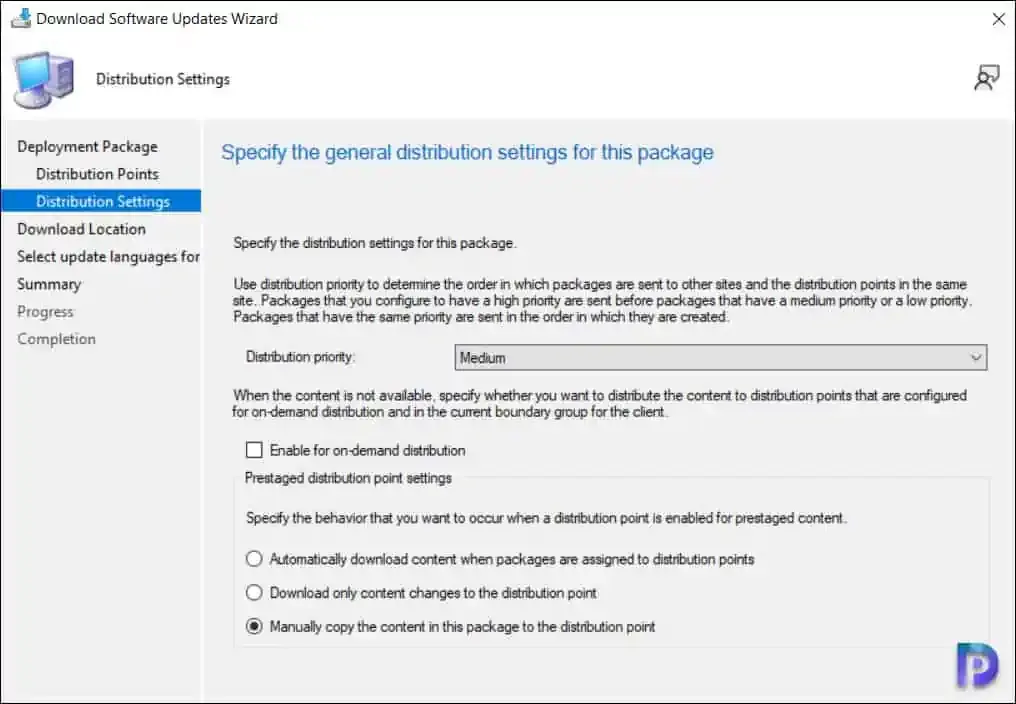
Specify the Deployment Package Distribution Settings

The download location lets you select an option to download the updates from. For example, you can download the software updates directly from internet or choose to download the software updates from the location on network. Select the option “Download software updates from the internet“. Click Next.

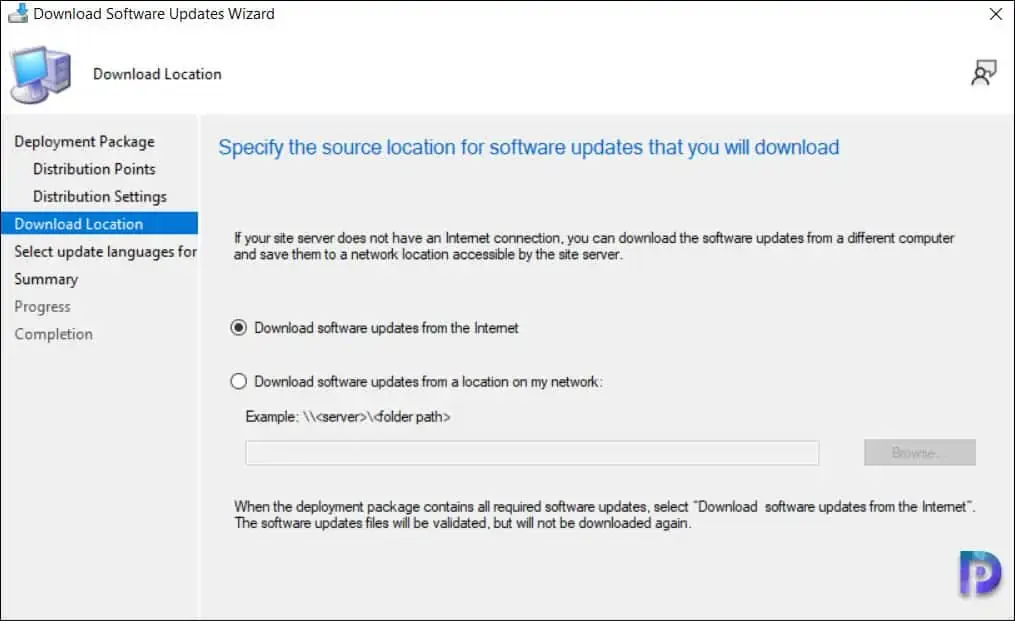
Choose the Download Location for Updates

Specify the update language for the products. The default language is English US. Click Next.

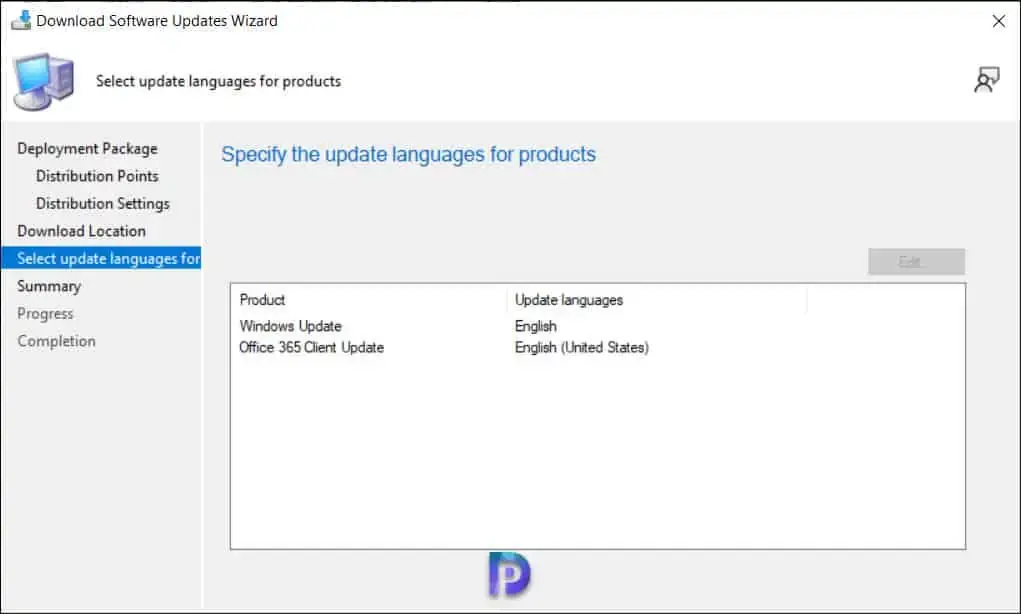
Select Update Languages for Products

Review the Windows 10 22H2 deployment package settings and close the Download software updates wizard.

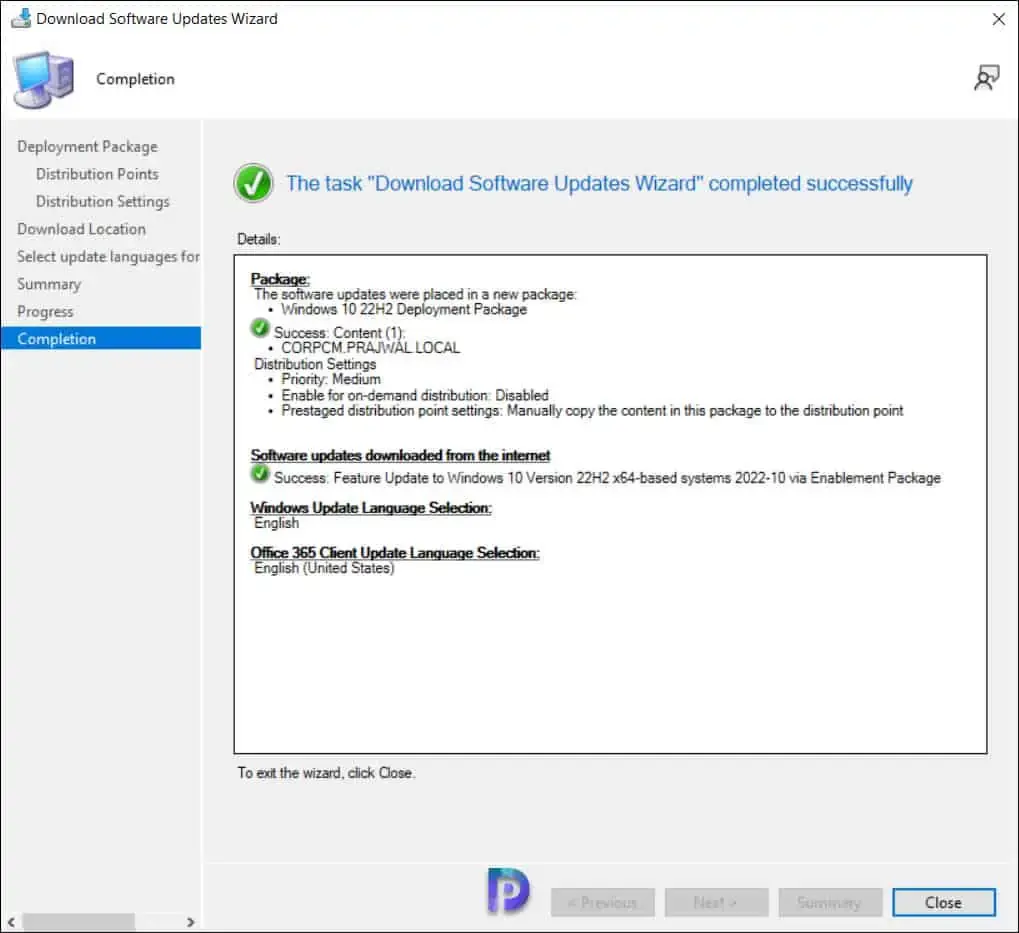
Close Download Software Updates Wizard

Note: In case you encounter issues while downloading the Windows 10 22H2 enablement package update, review the PatchDownloader.log located in the %temp% folder. This log file will log all the errors that occur during the download of Windows 10 feature updates.

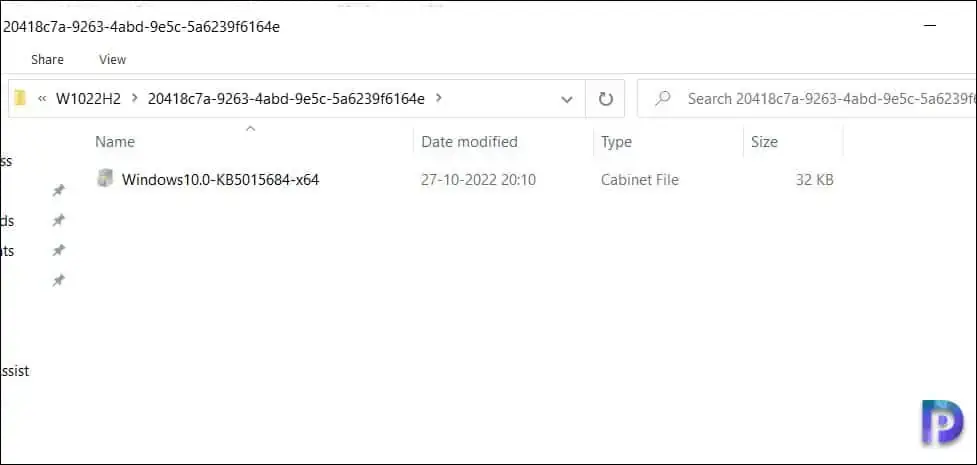
In the above step, the files required to upgrade Windows 10 to version 22H2 are downloaded to the specified location. If you browse to the downloaded location, you will notice that Windows 10 22H2 enablement package contains only one update which is Windows10.0-KB5015684-x64. The size of the Windows 10 22H2 enablement package is 32 KB. This one file is sufficient to upgrade Windows 10 computers to version 22H2.

Windows 10 22H2 Enablement Package

Deploy Windows 10 22H2 Feature Update using SCCM

In this step, using the Windows Servicing, we will perform the Windows 10 22H2 feature update deployment using Configuration Manager. You can deploy the feature update to a single client or to multiple devices using device collection.

If you are deploying the Windows 10 22H2 update for the first time, I suggest testing the upgrade on a Pilot device collection. A few devices that are intended to test the upgrade to 22H2 should be included in this device collection. Use the following guide to create a device collection for Windows 10 computers in SCCM.

Recommended Article: Upgrade Windows 10 21H1 using SCCM | ConfigMgr

Use the following steps to deploy the Windows 10 22H2 feature update using SCCM:

  • In the ConfigMgr console, navigate to Software Library\Overview\Windows Servicing\All Windows Feature Updates.
  • Right-click Feature Update to Windows 10 Version 22H2 x64-based systems 2022-10 via Enablement Package update, and select Deploy.

Deploy Windows 10 22H2 Feature Update using SCCM

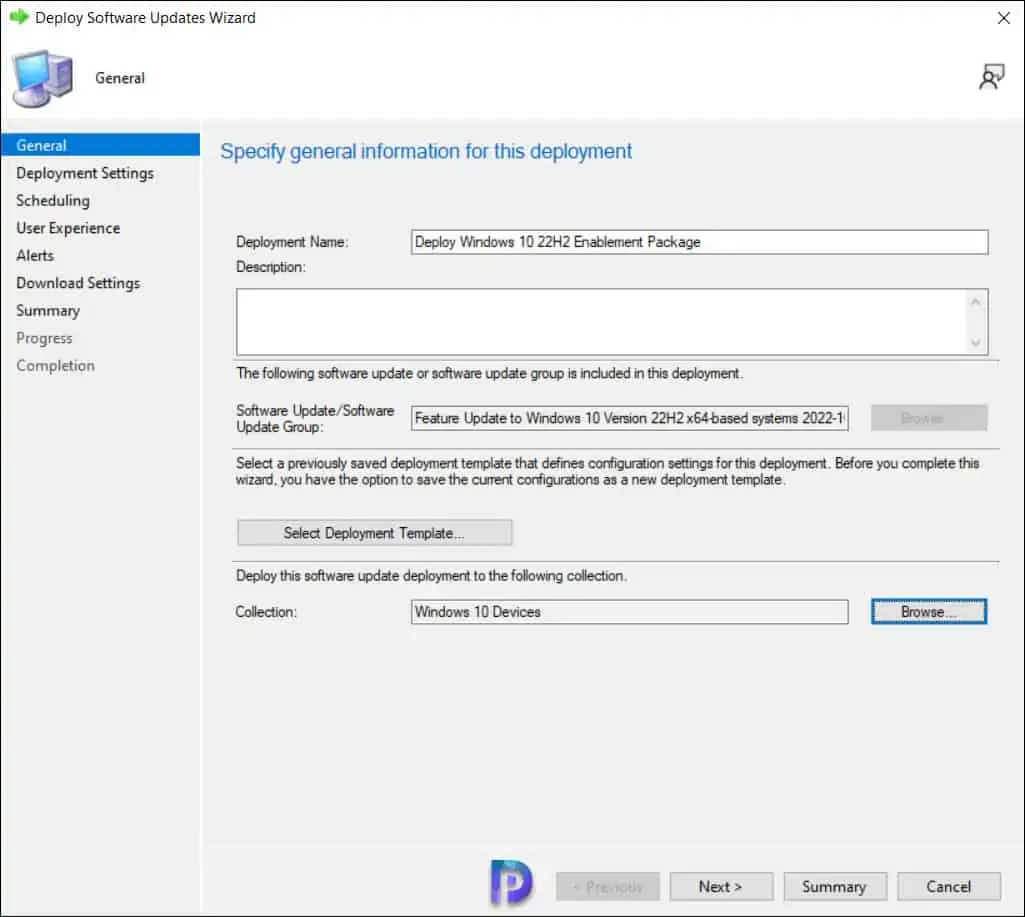
On the General page, enter the details for Windows 10 22H2 feature update deployment.

  • Deployment Name: Enter a suitable name such as Deploy Windows 10 22H2 Enablement Package.
  • Description: Although it’s optional, you may add a brief description.
  • Software Update Group: This is created automatically and is visible under Software Update Groups in Configuration Manager console.
  • Collection: Click Browse and select a device collection consisting of few pilot devices selected for testing Windows 10 2022 upgrade.

Click the Next button to continue.

Deploy Windows 10 22H2 Feature Update using SCCM

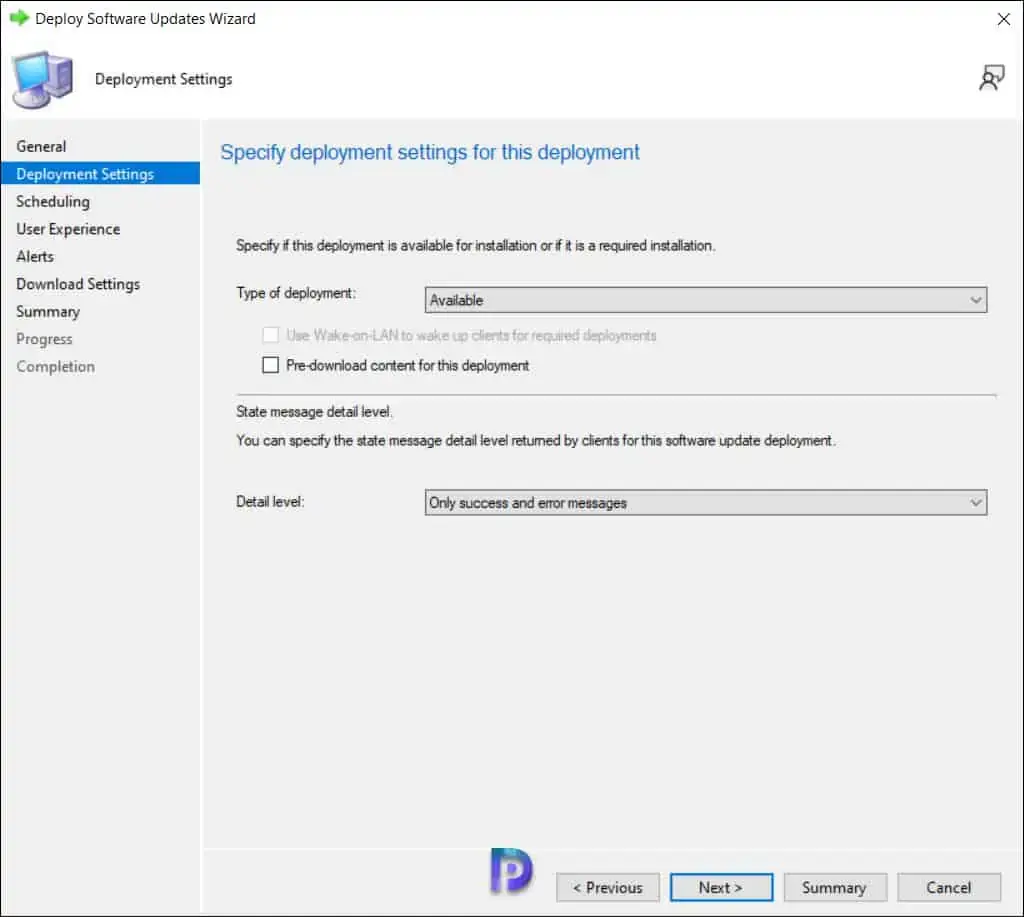
On the Deployment Settings page, specify the type of deployment. Choose whether you want to make the Windows 10 22H2 upgrade available for users in the Software Center or deploy it as required. Read more about SCCM Available vs. Required to know the differences. Click Next.

Deploy Windows 10 22H2 Feature Update using SCCM

The Scheduling page lets you configure schedule details for the deployment. Configure the following settings:

  • Schedule Evaluation | Time Based on: Select Client Local Time.
  • Software Available Time: As soon as possible.

If you want to make the Windows 10 22H2 upgrade available at a specific date and time, select Specific time and define them. Define the deadline installation to ensure the upgrade happens in the defined period.

Click Next to continue.

Deploy Windows 10 22H2 Feature Update using SCCM

Specify the following user experience settings for the deployment.

  • User Notifications: Display in Software Center and show all notifications
  • Commit changes at the deadline or during a maintenance window (requires restarts): Yes
  • If any update in this deployment requires a system restart, run updates deployment evaluation cycle after restart: No.

Click Next.

Deploy Windows 10 22H2 Feature Update using SCCM

On the Download settings page, specify the download settings for the current deployment:

  • Client Computers can use distribution points from neighbor boundaryNo
  • Download and install software updates from the fallback content source locationYes

Click Next to continue.

Deploy Windows 10 22H2 Feature Update using SCCM

Review the deployment settings of Windows 10 22H2 on Summary page and click Next. On the Completion window, click Close.

Deploy Windows 10 22H2 Feature Update using SCCM

Windows 10 22H2 Servicing: End-User Experience for Upgrade

After you have deployed Windows 10 22H2 enablement package update using Windows Servicing, it’s time to test the upgrade installation on end computers. The end-user experience is similar to other feature upgrades.

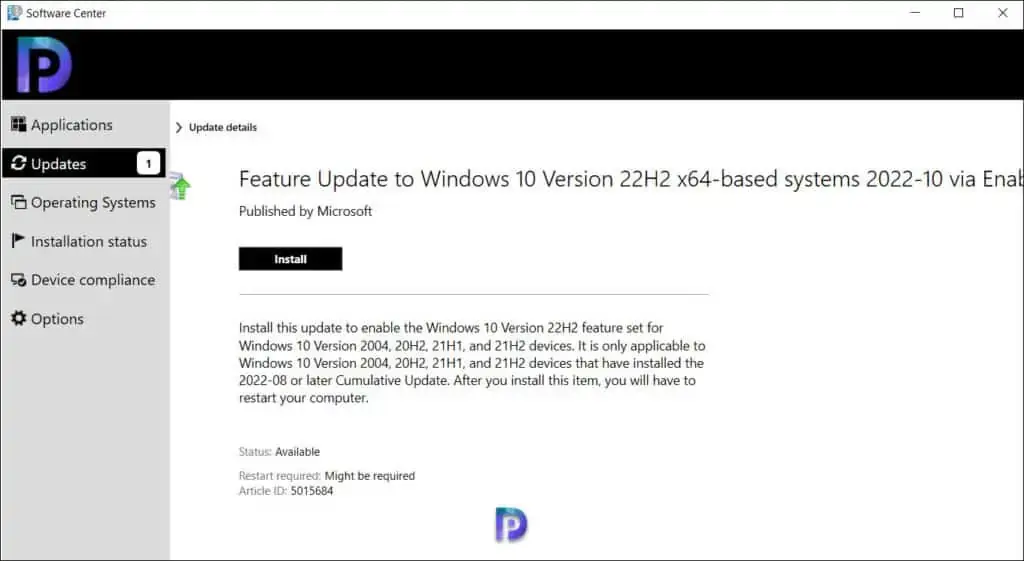
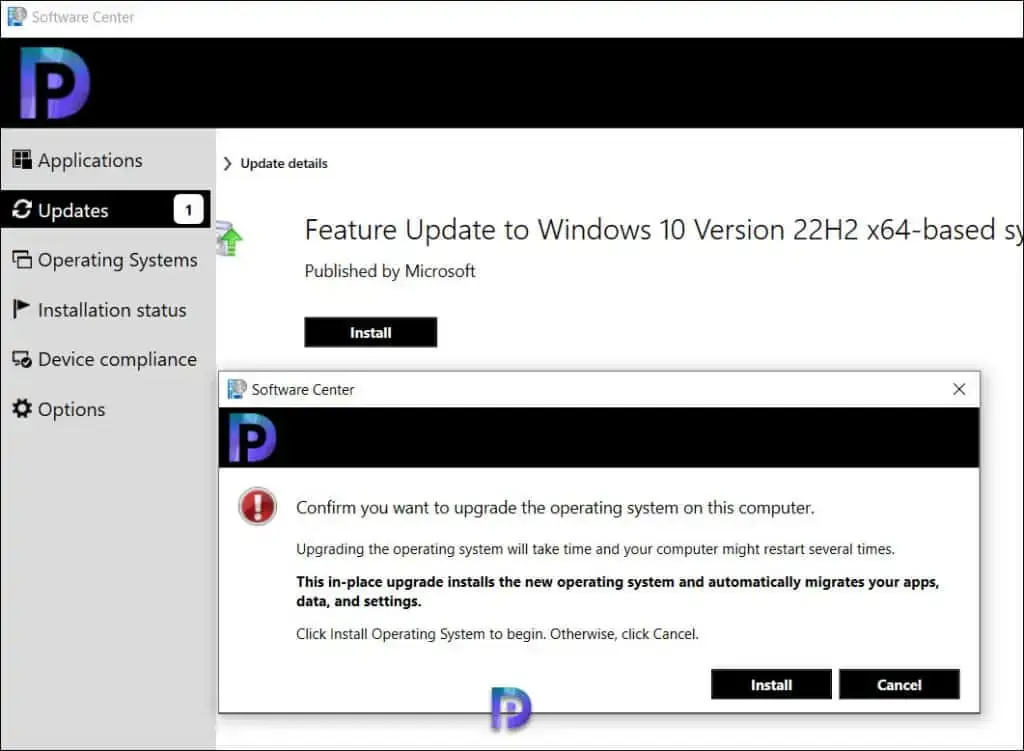
On the client computer, first launch the Software Center. Once the Software Center has been opened, select Feature Update to Windows 10 Version 22H2 x64-based systems 2022-10 via Enablement Package update by clicking the Updates tab. Click on the Install button.

Windows 10 22H2 Upgrade Servicing: End-User Experience

Confirm you want to upgrade the operating system on this computer. It will take only few minutes to upgrade the operating system as this is an enablement package. Note that this is an in-place upgrade to version 22H2, and the setup automatically migrates your apps, data, and settings. Click on the Install button to begin the Windows 10 22H2 upgrade.

Windows 10 22H2 Upgrade Servicing: End-User Experience

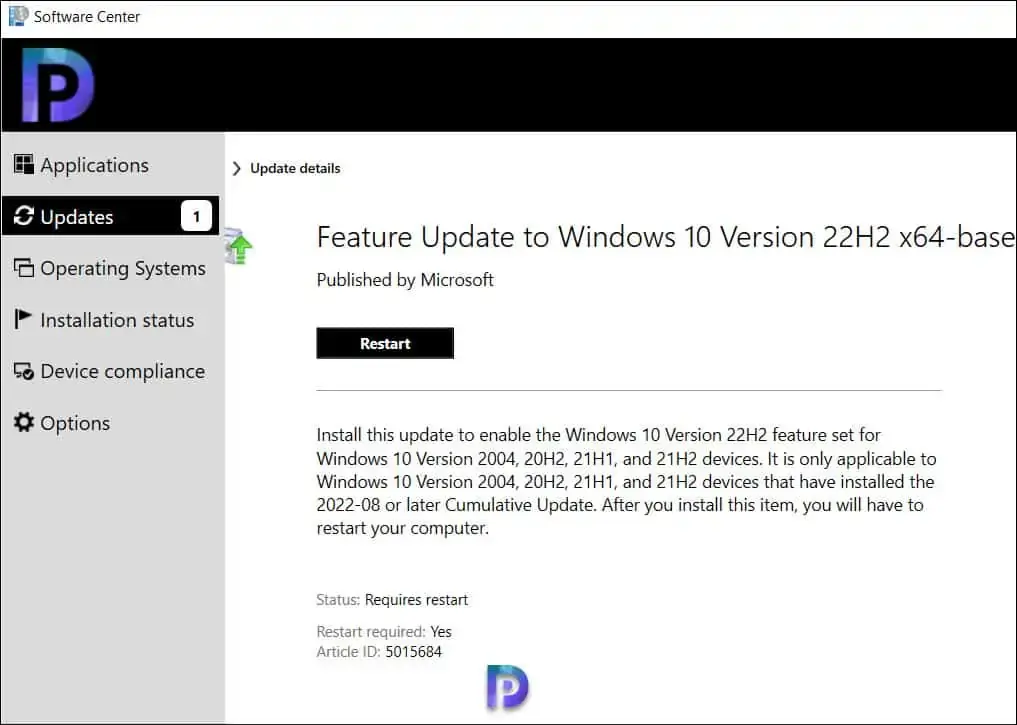
The Feature Update to Windows 10 Version 22H2 x64-based systems 2022-10 via Enablement Package is installed in less than 2 minutes. Click on Restart.

Restart the Computer to Complete Windows 10 22H2 Upgrade

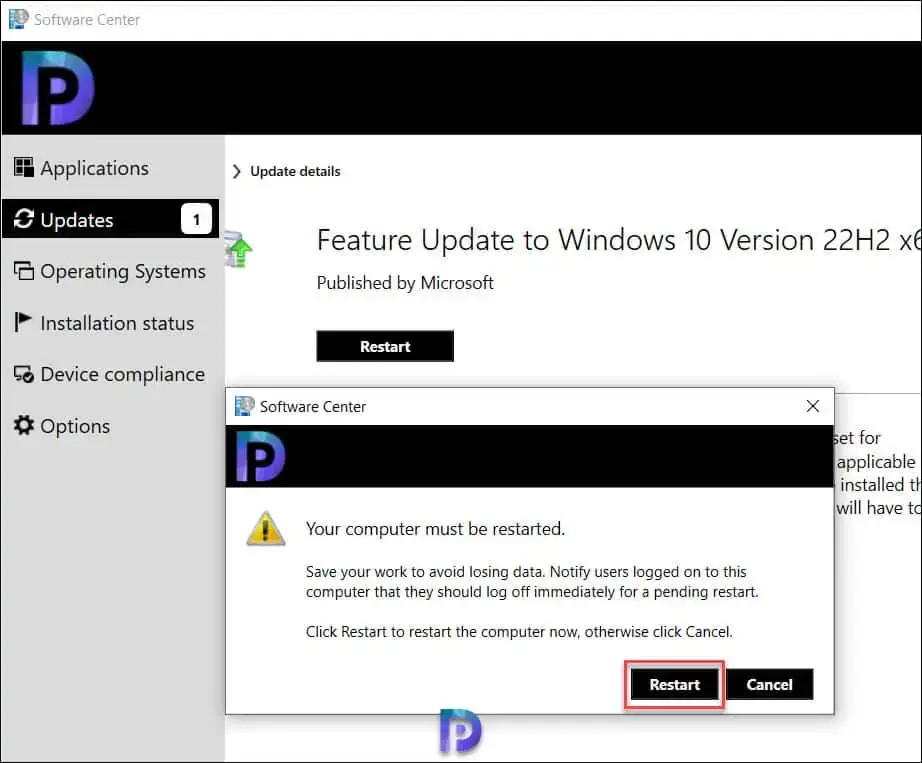
On the confirmation box, click Restart.

Restart the Computer to Complete Windows 10 22H2 Upgrade

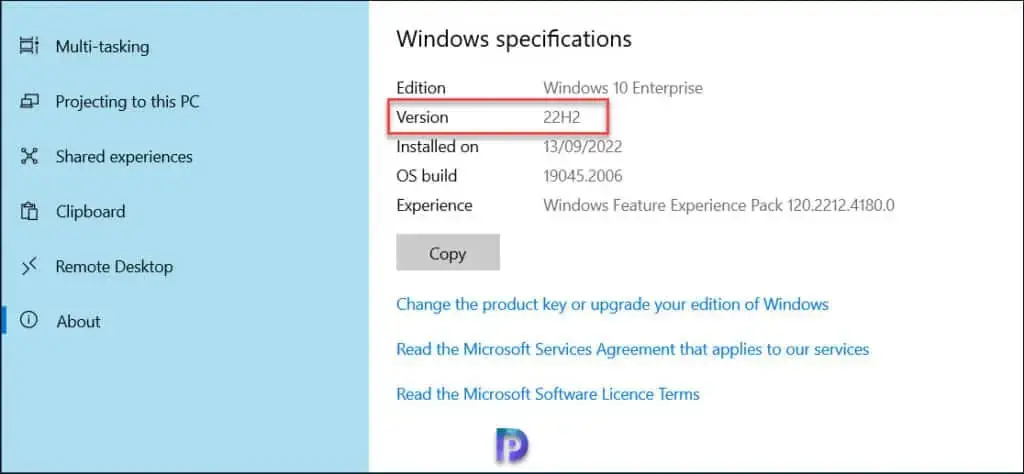
The Windows 10 22H2 upgrade is complete. Log in to the Windows 10 computers and click Start > About My PC. Under Windows Specifications, you will find the build number and version of Windows 10. In the below screenshot, we see the Windows version is “22H2” and the OS build number is 19045.2006.

Verify the Windows 10 22H2 Version and Build Number

After you have upgraded multiple Windows 10 computers to version 22H2, you can create a device collection in SCCM. Refer to this article to learn how to create Windows 10 22H2 device collection using WQL Query. If you want to get to Windows 11, you can upgrade to Windows 11 using different methods.

728x90
728x90

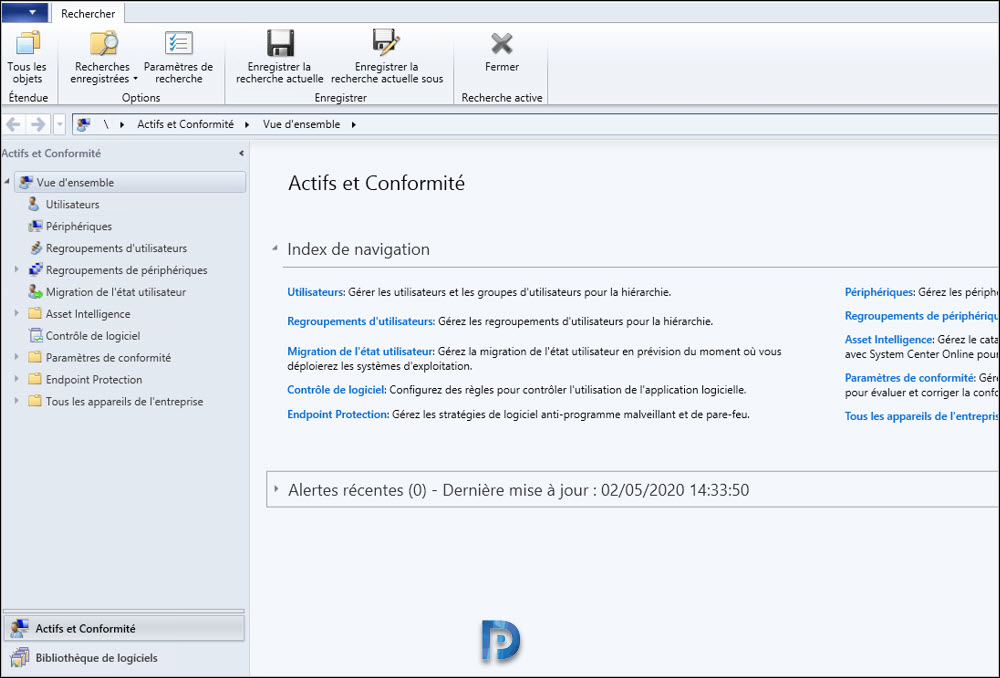
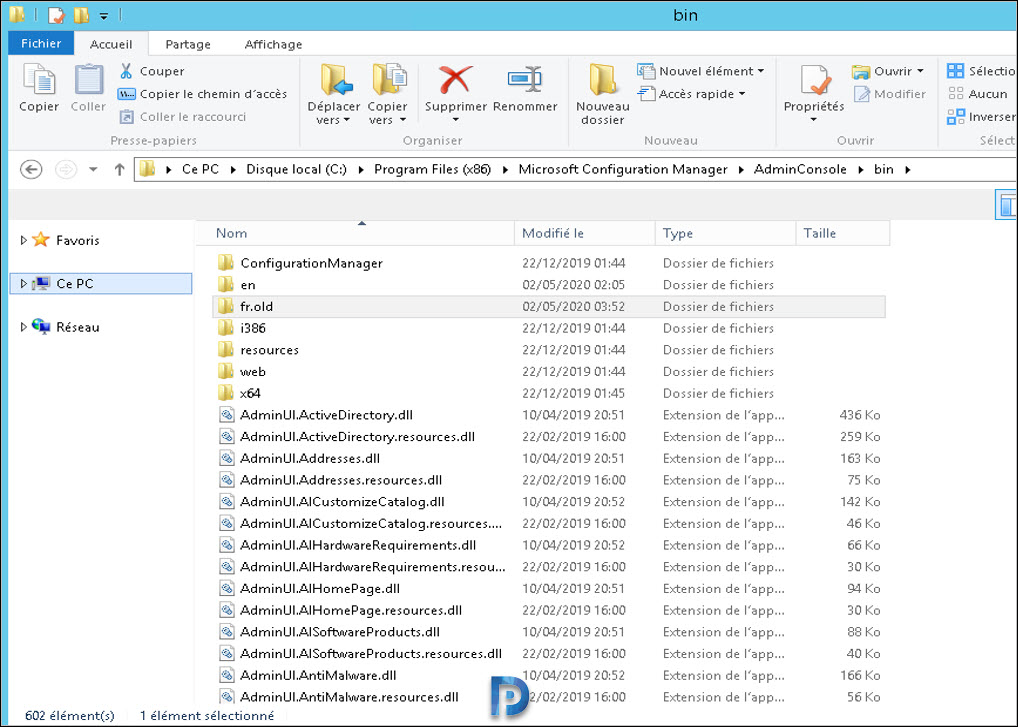
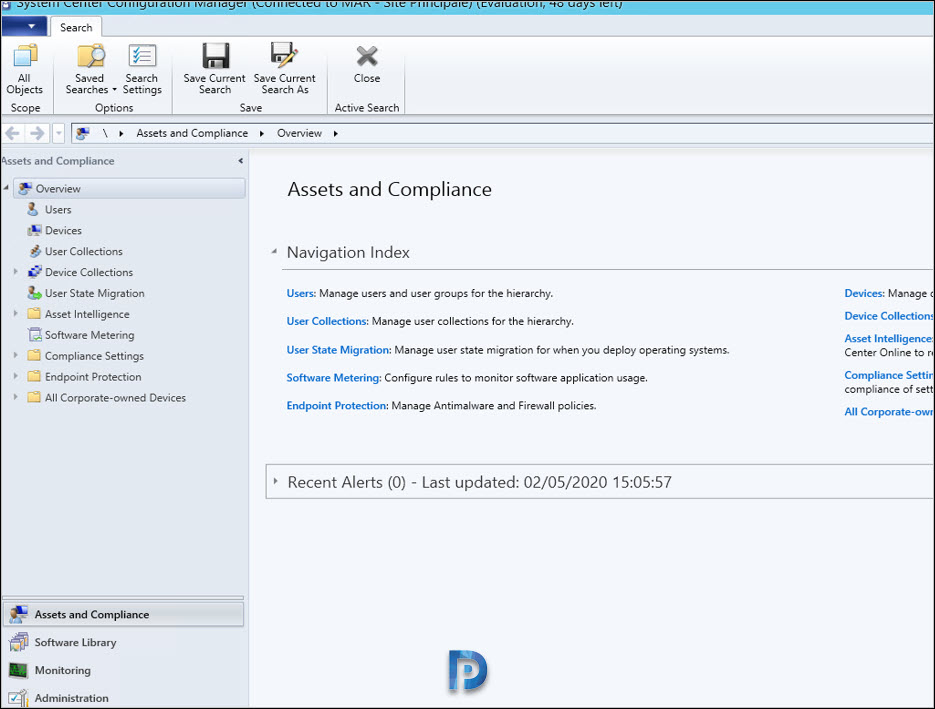
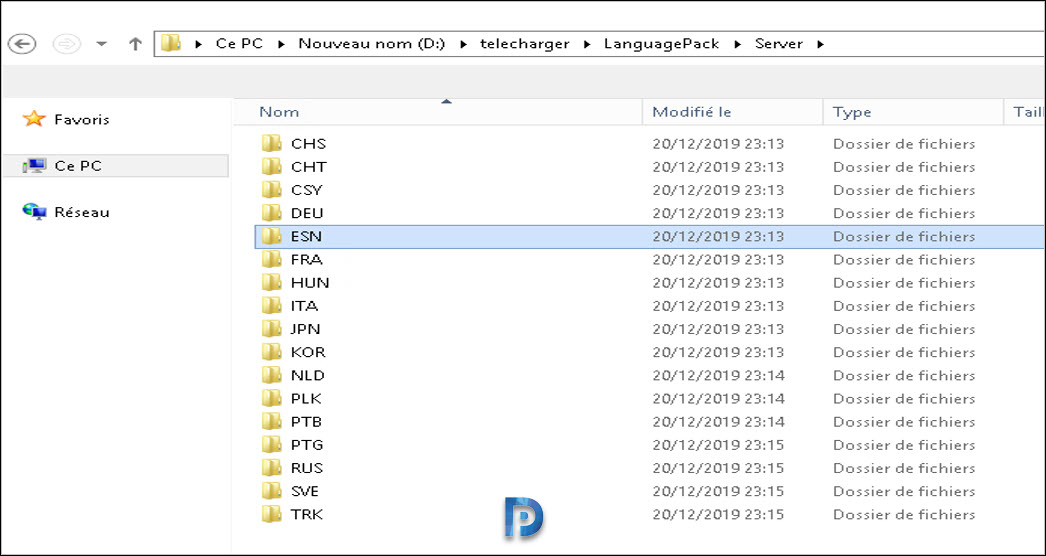
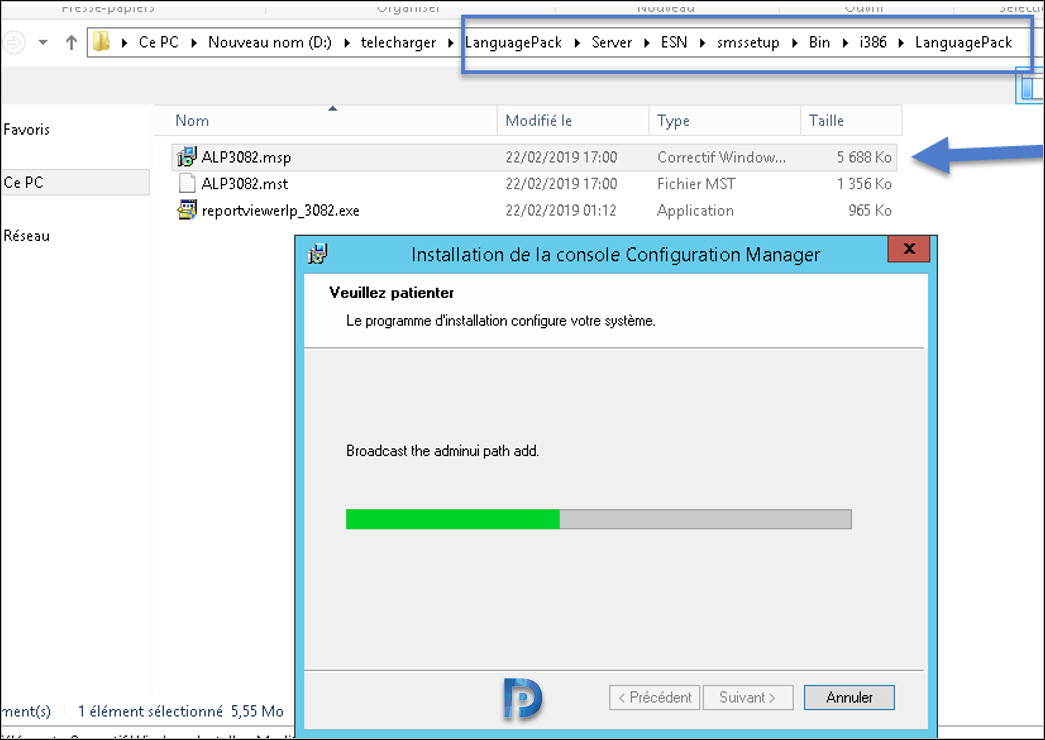
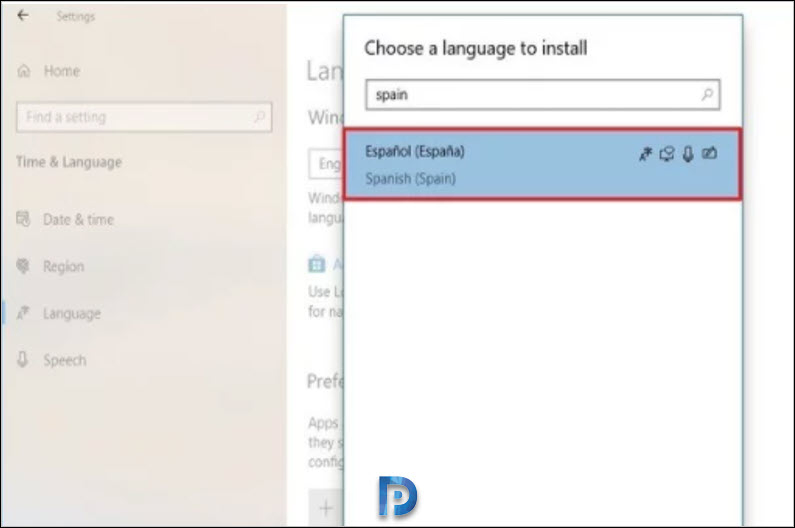
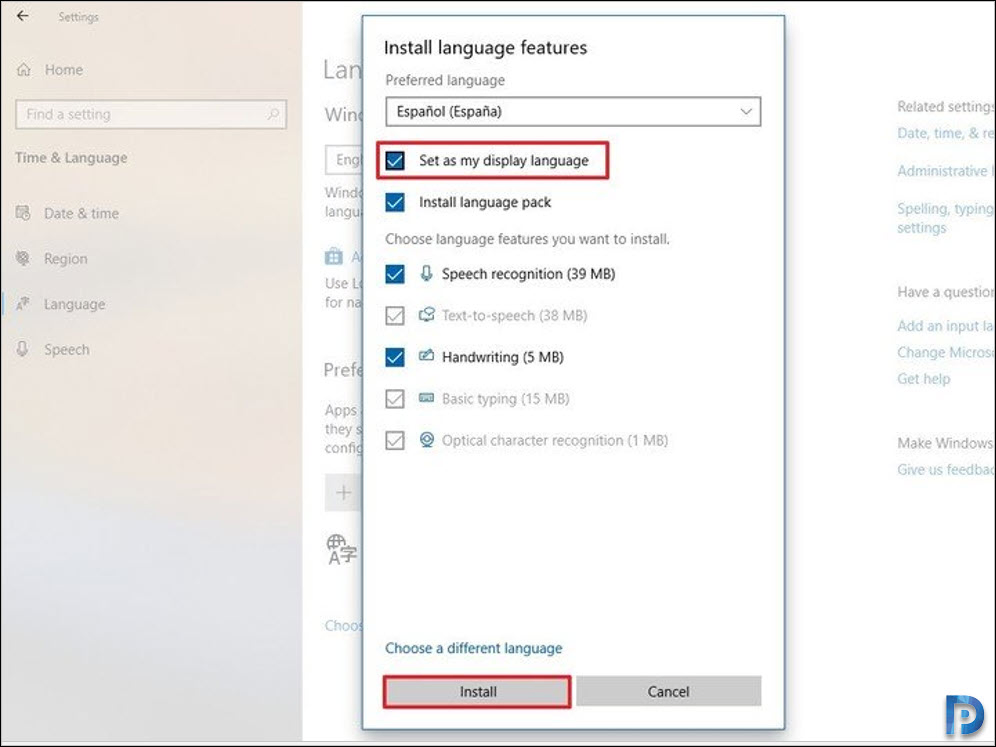
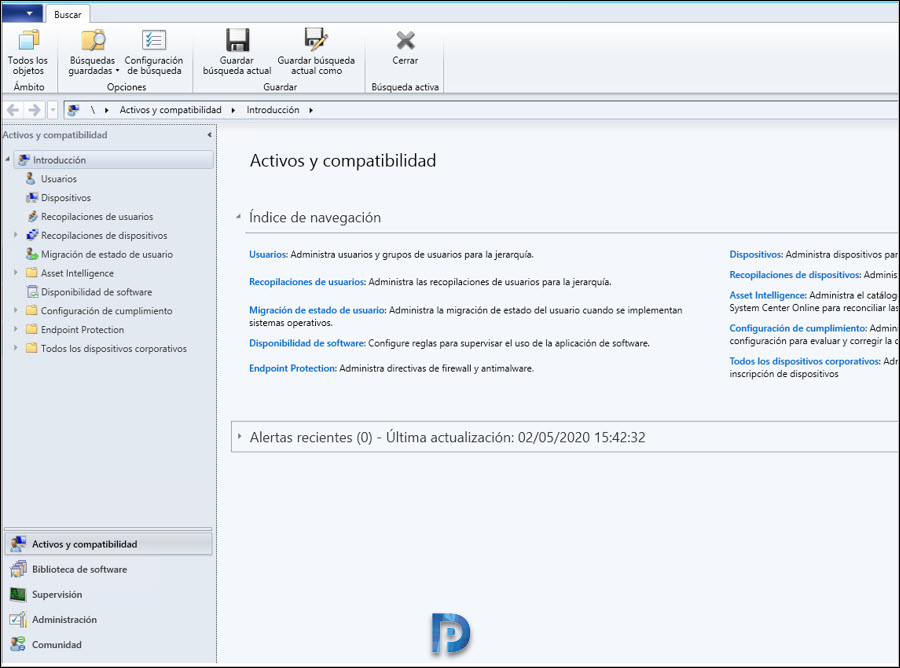
How to Change Configuration Manager(SCCM) Console Language

This post explains how to change or modify the default Configuration Manager (SCCM) console language. It also covers on how to change console language back to English.

By default the SCCM console picks the system language. However sometimes the technical support members will need the console in English or probably some other language.

Configuration Manager Console Language

During site server installation, the Configuration Manager console installation files and supported language packs are copied to the \Tools\ConsoleSetup. This is a sub-folder within the Configuration Manager installation path on the site server.

When you start the Configuration Manager console installation from this folder on the site server, it copies the Configuration Manager console and supported language pack files to the computer.

When a language pack is available for the current language setting on the computer, the Configuration Manager console opens in that language.

However if the associated language pack isn’t available for the Configuration Manager console, the console opens in English (United States).

About Configuration Manager Console

The Configuration Manager console is a tool that allows managing the Configuration Manager environment. By default the SCCM console is always installed on every site server.

It allows you to perform functions such as deploy applications, configure the settings, device management, and create packages and collections.

The Configuration Manager Console is a single management console for your PCs, Macs and Unix/Linux servers, as well as for mobile devices running Android, Windows or iOS.

For more information on ConfigMgr console deployment, refer below posts.

Prerequisites

In order to modify the language of Configuration Manager console

  • You must to be administrator of the computer on which you perform the below changes.
  • Have access to the installation files. (Download package language folder)

Change SCCM Console language to English

The below steps will now help you to change the SCCM console language from French language to English.

In this example, by default SCCM Console is displayed in the system language which is French.

The English language file is by installed by default when you install Windows 10.

First of all close the Configuration Manager console, and go to your console installation directory. %program files (x86)%\ Microsoft Configuration Manager\AdminConsole\bin.

Since our current console language is French, rename the fr folder to fr.old.

Now launch Configuration Manager console. Notice that the console language is English. We changed the SCCM console language from French to English with simple file rename.

Modify SCCM Console language from English to other language

We will now look at the steps to modify our SCCM console language from English to some other language.

To choose another language other than English, you require the files for your language. You then change the system language.

Go to download folder. Select Server folder and your language. (in my example ESN for Spain).

Run the file ALPxxxx.msp. Wait while the installation is done.

Go to Configuration Manager console installation directory and open the bin folder. We see a new folder es in the bin directory.

Now change your Windows 10 OS system language.

  • Right click Start and click Settings.
  • Click on Time & Language and then click Language.
  • Under the Preferred languages section, click Add a preferred language.

Search for the language you want on Windows 10. Select the language package from the list.

Ensure you set the new language as display language. Click Install.

Now launch Configuration Manager console. Notice that the new console language is now Spanish.

 
728x90
728x90

Disclaimer

I am writing this blog  and others to explain how things work and some ways deployment and operational tasks can be handled. In other words, these postings are for demonstration purposes only. Since I am not familiar with your organization or environment I do not know if these steps are applicable to your environment or are even safe to perform in your environment. It is recommended that you contact Microsoft Support prior to making changes in your environment to ensure that these steps are applicable to your environment, and are safe to perform in your environment. By writing this blog I am in no way recommending that you perform these steps in your own environment. If you choose to follow the steps outlined in this or other blog postings on this site, you are assuming the risk for your actions.

1              Troubleshooting Active Directory Replication

1.1                 Repadmin.exe

Repadmin is a tool for checking replication status and troubleshooting replication issue.  Below is a table highlighting commonly used syntax of the repadmin tool.

Syntax Usage
Repadmin /replsummary The replsummary operation quickly and concisely summarizes the replication state and relative health of a forest.
Repadmin /replsummary /bysrc /bydest /sort: delta The replsummary operation quickly and concisely summarizes the replication state and relative health of a forest.
Repadmin /showrepl <DC Name> Displays the replication partners for each directory partition on the specified domain controller. Helps the administrator build a visual representation of the replication topology and see the role of each domain controller in the replication process.
Repadmin /showutdvec Displays the highest Update Sequence Number (USN) for the specified domain controller. This information shows how up-to-date a replica is with its replication partners.
Repadmin /showobjmeta <DC> <DN of object> Displays the replication metadata for a specified object stored in Active Directory, such as attribute ID, version number, originating and local Update Sequence Number (USN), and originating server’s GUID and Date and Time stamp. By comparing the replication metadata for the same object on different domain controllers, an administrator can determine whether replication has taken place.
Repadmin /showconn Displays the connection objects for a specified domain controller. Default is local site.
Repadmin /replsingleobj <DC List> <Source DSA Name> <Object DN> Replicates a single object between any two domain controllers that have partitions in common. The two domain controllers do not have a replication agreement. Replication agreements can be shown by using the Repadmin /showrepl command.
Repadmin /replicate <Destination_DC_List> <Naming Context> Starts a replication event for the specified directory partition between the source and destination domain controllers. The source UUID can be determined when viewing the replication partners by using the Repadmin showrepl operation.
Repadmin /syncall <DC> Synchronizes a specified domain controller with all replication partners.
Repadmin /queue Displays tasks waiting in the replication queue.
Repadmin /showmsg <Error> Displays the error message for a given error number.
Repadmin /viewlist <DC_List> Displays a list of domain controllers.
Repadmin /showctx <DC_List> Displays a list of computers that have opened sessions with a specified domain controller.
Repadmin /showcert Displays the server certificates loaded on a specified domain controller.
Repadmin /removelingeringobjects <Dest_DC_List> <Source DC GUID> <NC> [/ADVISORY_MODE] Uses an authoritative domain controller to compare the directory of a domain controller (destination) that is suspected of having lingering objects against the directory of a domain controller (source) that is designated as a reference source for up-to-date values for the domain of the destination. When the advisory mode parameter is used, this command provides a list of found lingering objects. When the advisory mode parameter is not used, this command removes lingering objects from the destination domain controller.

Additional information on Repadmin.exe is available here: https://technet.microsoft.com/en-us/library/cc736571(v=ws.10).aspx

1.2                 Repadmin /replsummary

As seen in the screenshot below repadmin /replsummary will give statistics for replication with replication partners.  The output also lists any errors that were encountered with replication. This is useful for getting an overview of any replication issues the DC is having.

You can also sort the output.  In the example below, the output is sorted by the largest delta since last replication.

1.3                 Repadmin /showrepl

As seen below repadmin /showrepl shows the replication status with all of the DCs replication partners and is sorted by the Naming Context that is being replicated.

One trick that can be used to get a more manageable output is to use repadmin to send its output to a CSV and the use PowerShell to convert the CSV to a GridView.  The command to do this is repadmin /showrepl * /csv | ConvertFrom-CSV | Out-GridView

The resulting output is in a manageable GUI.

In GridView you can sort and filter.  Below is an example of filtering on Number of Failures, so that I can easily see what failed.

1.4                 Repadmin /showutdvec

Replications changes are tracked through incrementing numbers called USNs.  There are times where you will want to know what knowledge each DC has about other DCs current state.  The up-to-dateness vector is the knowledge that a DC as about the current state of other DCs.  This information can be useful when trying to troubleshoot replication issues such as USN Rollback.  USN Rollback is when a DC is restored from an unsupported method such as a snapshot.  In that case the up-to-dateness vector would be much larger than the actual USN of the DC. Since, there is going to be some delay in replication you will notice some differences but the numbers should be relatively close.  For example, if you compare the up-to-dateness vector for DC01 across DCs you will notice the following: for itself DC01 has USN of 17347, DC02 has a USN of 17346 for DC01, and DC03 has a USN of 17346 for DC01.  So, we can see the numbers are relatively close and that DC01 potentially has one change that it needs to replicate to DC02 and DC03.

1.5                 Repadmin /showobjmeta

The /showobjmeta switch shows detailed information for attributes of an object.  It is most commonly used when comparing the output of the command from 2 DCs to see if they are in sync and the current status of the attributes.  Differences can be used to identify replication problems.

1.6                 Repadmin /syncall

Repadmin /syncall is used to force replication between domain controllers.  You can easily view options for the /syncall switch with the following command: repadmin /syncall /?

A normal use of repadmin /syncall is with the /AeP switch

1.7                 Repadmin /showmsg

The /showmsg switch is used to convert an error message you may receive as the result of a repadmin command and converts it to human readable text.

1.8                 Repadmin /viewlist

Repadmin /viewlist is used to get a list of domain controllers.

1.9                 PowerShell

PowerShell is an object oriented scripting language that allows enterprises to automate IT tasks.

Below is a conversion table that shows the PowerShell command that can be used in place of the Repadmin command.  So, why would you choose to use PowerShell?  The output of PowerShell commands are objects those objects can be filtered with properties, piped through other PowerShell commands and manipulated to many useful things including great control in how the data is presented to the user.

Command PowerShell Cmdlet
Repadmin /FailCache Get-ADReplicationFailure
Repadmin /Queue Get-ADReplicationQueueOperation
Repadmin /ReplSingleObj Sync-ADObject
Repadmin /ShowConn Get-ADReplicationConnection
Repadmin /ShowObjMeta Get-ADReplicationAttributeMetadata
Repadmin /ReplSummary Get-ADReplicationPartnerMetadata
Repadmin /Showutdvec Get-ADReplicationUpToDatenessVectorTable
Repadmin /SiteOptions Set-ADReplicationSite
Repadmin /ShowAttr Get-ADObject
Repadmin /Set Attr Set-ADObject

Get-ADReplicationParnerMetadata is very similar to running repadmin /showrepl.  Without passing the output through another cmdlet the formatting is a bit different then to what you get with repadmin.

However, the advantage is that the output of the command are objects.  You can constrain your views to certain properties.

The other advantage is that you can pass objects through other cmdlets.  As seen here I am passing the output of Get-ADReplicationPartnerMetadata through Output-GridView.

Once in GridView you have the ability to sort and filter the data.

Here is another example of the usefulness of using PowerShell over repadmin.  In this example I take the output of Get-ADReplicationPartnerMetadata then passing it through Select-Object so that we can then limit what objects are presented in GridView.

Here we see the output of that command.

1.10             Replication Errors

Here is a list of replication errors you may come across in either the Directory Services event log or while running repadmin.

Event ID Replication Error Issue
1388   Lingering Objects
1988   Lingering Objects
2042   Lingering Objects
1925   DNS Lookup Issues or Connectivity Problems
2087   DNS Lookup Issues
2088   DNS Lookup Issues
1311   Replication Topology Issues
  8614 Tombstone lifetime exceeded
  8524 DNS Lookup failure
  8456 Server is currently rejecting replication requests
  8457 Server is currently rejecting replication requests
  8453 Access was denied
  8452 The naming context is in the process of being removed or is not replicated from the specified server
  5 Access is denied
  -21468930222 The target principal name is incorrect
  1753 There are no more endpoints available from the endpoint mapper
  1722 The RPC server is unavailable
  1396 Logon Failure The Target account name is incorrect
  1256 The remote system is not available
  1127 While accessing the hard disk, a disk operation failed even afer retries
  8451 The replication operation encountered a database error
  8606 Insufficient attributes were given to create an object

2              Troubleshooting Steps for Common Replication Issues

2.1                 Troubleshooting -21468930222  (The target principal name is incorrect)

On the DC that is the cause of the error, perform the following steps:

Step 1: Open Services.msc

Step 2: Configure KDC Service for Manual

Step 3: Stop the Service

Step 4: Restart the Domain Controller

Step 5: Open PowerShell as an Administrator

Step 6: Run: $cred = Get-Credential

Step 7: Enter Credentials and click OK

Step 8: Run, Reset-ComputerMachinePassword –Server <ServerName> -Credential $cred

Step 9: Restart the server

Step 10: Set the KDC service to Automatic, Start the service and click OK.

2.2                 Troubleshoot Replication Error 8606, Event ID 1388, and Event ID 1988

These issues are caused by lingering objects.  Lingering objects can be caused when a domain controller is taken offline for an extended period of time, does not replicate for longer than the tombstone lifetime, or is restored from a backup that is older than the tombstone lifetime. 

When an object is deleted it is put in a tombstone state.  After the tombstone lifetime passes (typically 180 days), DC run garbage collection and those tombstone objects are deleted.  If a DC was offline for the entire TSL and then were brought back online they may have objects that have since been deleted, tombstoned, and garbage collected.  Any objects that were deleted will still exist on that DC.  These objects go unnoticed until a change is made to that object then the DC attempts to replicate that object, and at that point that is where it is either re-introduced into the environment or if strict replication consistency is enabled, blocked. 

2.2.1   How to Determine TSL

Run the following command: dsquery * “cn=directory service,cn=windows nt,cn=services,cn=configuration,<Forest DN>” –scope base –attr tombstonelifetime

2.2.2   How to Remove Lingering Objects

2.2.2.1          Repadmin /removelingeringobjects

One way to remove lingering objects is to user repadmin with the /removelingeringobjects switch.  First you must identify a clean source of the partition.  The syntax of the command is repadmin /removelingeringobjects <Dest DC Name> <Source DC Guid> <Naming Context>.  So, in other words you need to identify the source DCs guid and the Naming Context you want to clean.  The naming context will be available in the Event 1388 or 1988 you receive in the event long.  Once you find a clean source you can obtain the guid by opening DNS Manager and opening up the _msdcs Zone and obtaining the CName record for the DC in question.

Below is an example of running the repadmin /removelingeringobjects command

You will receive an Event 1937 when the removal of lingering objects begins.

You will then receive an Event 1939 when removal completes.

2.2.2.2          Repadmin /rehost

An alternative to using repadmin /removelingeringobjects command is to unhost the partition so that the domain controller no longer has that partition and then rehosting the entire partition with a good source.

The repadmin syntax for unhosting the partition is repadmin /unhost <DC Name> <Partition Name>

You will receive an event an event 1658 when the removal begins.

You will receive an event 1660 when the removal completes

The syntax for rehosting the partition is: repadmin /rehost <Dest DC Name> <Partition> <Source DC Name>

2.3                 Troubleshooting Event ID 2042

Review event log for any 1988 or 1388 errors.  If found use the previous section to remove the lingering objects from the domain controller. 

Option 1: Re-hosting the partition that has not replicated

If the partition is a GC partition consider unhosting and rehosting the partition. Instructions for unhosting and rehosting are in the previous section called Repadmin /rehost

Option 2: Removing and then re-adding the domain controller to Active Directory

Another option is removing the DC from Active Directory and Re-promoting the Domain Controller

Step 1: Run Import-Module ADDSDeployment

Step 2: Run: Uninstall-ADDSDomainController –DemoteOperationMasterRole:$true –Force:$true

Step 3: Enter and confirm the new local password

Step 4:  Next you will need to run the Install –ADDSDomainController cmdlet.  Below is a sample that you can use.  You will need to modify the template to meet the requirements of your environment. 

Install-ADDSDomainController –NoGlobalCatalog:$false –CreateDnsDelegation:$false –CriticalReplicationOnly:$false –DatabasePath “C:\Windows\NTDS” –DomianName “fabrikam.com” –InstallDNS:$true –LogPath “C:\Windows\NTDS” –ReBootOnCompletion:$false –ReplicationSourceDC “DC01.fabrikam.com” –SiteName “Default-First-Site-Name” –SysvolPath “C:\Windows\SYSVOL” –Force:$true

Option 3: Enabling Replication with Divergent and Corrupt Partner

Due to the risk of adding lingering objects to Active Directory the final consideration should be enabling the following setting: Allow Replication With Divergent and Corrupt Partner. 

Step 1: To enable this setting run the following command on the domain controller:

repadmin /regkey <hostname> +allowDivergent

Step 2: Let replication complete

Step 3: Disable the setting with the following command: repadmin /regkey <hostname> -allowDivergent

2.4                 Troubleshooting Event ID 1311

Event 1311 is caused when there is not complete connectivity between domain controllers. There are a number of reasons there may not be complete connectivity. 

2.4.1   ISTG

The Inter-Site Topology Generator (ITSG) is responsible for building the replication topology.  So to determine what the scope of the connectivity issues it is important to identify the ISTGs that are logging 1311. 

To find the ISTGs in your environment you need to use ldp.exe

Below are the steps for locating the ISTGs:

Step 1: Launch ldp.exe

Step 2: When LDP opens, select Connection and then Connect…

Step 3: In the Connect dialog box, enter the name of a Domain Controller for the Server you want to connect to and then click OK

Step 4: Click on Connection and then click Bind…

Step 5: In the Bind dialog box, click OK

Step 6: Select the Browse menu and then select Search

Step 7: In the search enter the following:

Base DN: CN=Sites,CN=Configuration,<DN of Forest Root> (example: CN=Sites,CN=Configuration,DC=fabrikam,DC=com)

Filter: (CN=NTDS Site Settings)

Scope: Subtree

Attributes: Append the following to the attributes that are already listed: ;interSiteTopologyGenerator

Step 8: Click Run

Step 9: For each site you will then need to look for interSiteTopologyGenerator to determine the ITSG for each site.

2.4.2   BASL

By default, Bridge All Site Links (BASL) is enabled in Active Directory.  If your environment is not fully routed, then you will want to disable BASL.  By fully routed we mean each site can contact every other site.  If BASL is configured on a network which is not fully routed, the KCC will generate site bridges that cannot actually be reached. To determine if BASL is enabled launch Active Directory Sites and Services (dssite.msc). 

Expand Sites, then Inter-site Transports.

Right-click on IP and select Properties from the context menu

If Bridge all site links is enabled, there will be a check box next to it.  To disable BASL, uncheck the checkbox and click OK.

2.4.3   Site Link Bridges

If you disable BASL you can still bridge site links.  You would do that if you wanted two spoke sites to communicate directly if they could not communicate with the hub site.  In a hub and spoke configuration the cost of crossing to site links (bridging a site link) will typically be a higher then just connecting directly to the hub site.  So, ordinarily you would not have to worry about the Site Link Bridge being used instead of a direct site link.  That being said, there are not a whole lot of scenarios where you would need to create Site Link bridges.

The following steps will allow you to bridge two site links.

Step 1: Open the Active Directory Sites and Services MMC.

Step 2: Expand Sites and then expand Inter-site Transports

Step 3: Select New Site Link Bridge… from the context menu


Add at least two sites to the Site Link Bridge, give it a Name, and click OK

And the Site Link Bridge has been completed.

2.4.4   Verify that all Sites are in a Site Link

Step 1: Run the following command in a PowerShell Console: Get-ADObject –LDAPFilter ‘(objectClass=site)’ –SearchBase (Get-ADRootDSE).ConfigurationNamingContext –Property Name | Format-Table Name

Step 2: In another PowerShell Console run: Get-ADObject –LDAPFilter ‘(objectClass=sitelink)’ –SearchBase (Get-ADRootDSE).ConfigurationNamingContext –Property Name, Cost, Description, Sitelist | Format-List Name, Sitelist

Step 3: Verify that each site that was listed in Step 1 exists in one of the site lists returned in Step 2

If not all sites are contained in a site link that you need to determine what site link that site needs to be added to or if a new site link needs to be created.

And that is all I have for replication troubleshooting for today.


출처 : Troubleshooting Active Directory Replication – xdot509.blog

728x90
728x90

1. 2022 유성 온천 크리스마스 축제(12.2.(금) ~ 12.4.(일) 


유성온천문화축제의 겨울 버전으로 기획된 이번 축제는 12월 2일 성탄트리 점등식을 시작으로 3일과 4일 양일간 ▲크리스마스마켓, ▲어린이놀이존(꼬마기차), ▲크리스마스 공연 등이 펼쳐진다.

마켓에서는 크리스마스시즌을 겨냥한 트리, 리스, 캔들 등 홈데코용품과 선물용 제품 위주로 판매될 예정이며, 어린이 방문객을 위한 꼬마레일기차와 어린이뮤지컬, 마술쇼 등도 마련된다.

또한 유성온천 관광거점사업의 일환인 ‘빛의 거리 조성사업’이 축제를 시작으로 내년 1월까지 대학로와 온천로를 화려하게 수놓을 예정이다.

이번 빛의 거리 조성사업은 ▲대학로 샹젤리제 거리 조성 ▲대온장 외벽 미디어파사드 연출 ▲대형미디어트리 등으로 구성.


2. 2022년 천안 세계 크리스마스 축제(12.3.(토) ~ 12.25.(월) 

3. 해운대 북극곰 축제(2022.12.23.(금) - 12.24.(토))


728x90
728x90


728x90
728x90

카타르월드컵 조별 경기 일정

11월20일 개최국 카타르와 에콰도르의 개막전을 시작합니다.

A~H조 까지의 각 나라들의 예선 경기 일정을 알아 보도록 하겠습니다.

A조

날짜경기

11월 20일 19:00 카타르 vs 에콰도르
11월 21일 19:00 세네갈 vs 네덜란드
11월 25일 16:00 카타르 vs 세네갈
11월 25일 19:00 네덜란드 vs 에콰도르
11월 29일 18:00 네덜란드 vs 카타르
11월 29일 18:00 에콰도르 vs 세네갈

B조

날짜경기

11월 21일 16:00 잉글랜드 vs 이란
11월 21일 22:00 미국 vs 웨일스
11월 25일 13:00 웨일스 vs 이란
11월 25일 22:00 잉글랜드 vs 미국
11월 29일 22:00 웨일스 vs 잉글랜드
11월 29일 22:00 이란 vs 미국

C조

날짜경기

11월 22일 13:00 아르헨티나 vs 사우디아라비아
11월 22일 19:00 멕시코 vs 폴란드
11월 26일 16:00 폴란드 vs 사우디아라비아
11월 26일 22:00 아르헨티나 vs 멕시코
11월 30일 22:00 폴란드 vs 아르헨티나
11월 30일 22:00 사우디아라비아 vs 멕시코

D조

날짜경기

11월 22일 16:00 덴마크 vs 튀니지
11월 22일 22:00 프랑스 vs 호주
11월 26일 13:00 튀니지 vs 호주
11월 26일 19:00 프랑스 vs 덴마크
11월 30일 18:00 호주 vs 덴마크
11월 30일 18:00 튀니지 vs 프랑스

E조

날짜경기

11월 23일 16:00 독일 vs 일본
11월 23일 19:00 스페인 vs 코스타리카
11월 27일 13:00 일본 vs 코스타리카
11월 27일 22:00 스페인 vs 독일
12월 01일 22:00 일본 vs 스페인
12월 01일 22:00 코스타리카 vs 독일

F조

날짜경기

11월 23일 13:00 모로코 vs 크로아티아
11월 23일 22:00 벨기에 vs 캐나다
11월 27일 16:00 벨기에 vs 모로코
11월 27일 19:00 크로아티아 vs 캐나다
12월 01일 18:00 크로아티아 vs 벨기에
12월 01일 18:00 캐나다 vs 모로코

G조

날짜경기

11월 24일 13:00 스위스 vs 카메룬
11월 24일 22:00 브라질 vs 세르비아
11월 28일 13:00 카메룬 vs 세르비아
11월 28일 19:00 브라질 vs 스위스
12월 02일 22:00 세르비아 vs 스위스
12월 02일 22:00 카메룬 vs 브라질

H조

날짜경기

11월 24일 16:00 우루과이 vs 대한민국
11월 24일 19:00 포르투갈 vs 가나
11월 28일 16:00 대한민국 vs 가나
11월 28일 22:00 포르투갈 vs 우루과이
12월 02일 18:00 가나 vs 우루과이
12월 02일 18:00 대한민국 vs 포르투갈

각 조의 1위와 2위가 다음라운드인 16강에 진출하게 됩니다.

따라서, 16강에 진출하기 위해서는 반드시 2위 안에 들어야 합니다.

16강에 진출하게 되면 같은 조에 있던 나라를 제외하고, 서로 다른 조에 있던 1위와 2위가 경기를 하게 됩니다.

카타르월드컵 중계 채널

2022카타르월드컵의 중계의 주관 방송사는 SBS입니다.

지상파와 그 계열사의 중계의 경우 SBS가 KBS와 MBC에 중계권을 재판매하는 형식이 되겠습니다.

각 방송사 중계진

이번 2022카타르월드컵 중계는 지상파 3사가 유명 선수 출신들을 해설가로 섭외하였습니다.

먼저, KBS는 남현종, 이광용 캐스터가 진행을 맡았습니다.

해설진으로는 구자철, 조원희, 한준희, 임형철, 황덕연 해설위원으로 구성되어 해설을 맡아주시겠습니다.

새로 합류한 구자철 선수의 해설위원으로서 첫발이 기대되는 상황입니다.

다음 MBC는 김성주, 김나진, 김정근 캐스터가 맡아 진행을 합니다.

해설진은 안정환, 서형욱, 박문성, 박찬우 해설위원으로 구성되어 해설을 맡아주시겠습니다.

방송 3사중에서 대중성과 인지도가 가장 높습니다.

또한, 이번 월드컵부터 MBC로 복귀한 박문성 해설위원의 행보가 기대가 되는 상황입니다.

SBS는 배성재, 이재형 캐스터가 진행을 하겠습니다.

해설진으로는 박지성, 장지현, 현영민, 김동완, 이승우 해설위원으로 구성되어 해설을 맡아주시겠습니다.

배성재 캐스터는 해설자 수준의 높은 수준의 축구 지식을 가지고 있는 캐스터 입니다.

현재 지상파 3사를 통틀어 캐스터중에서는 역량을 따라올 자가 없다고 보여집니다.

다만, 지속적으로 이어져 온 시청률 부진을 어떻게 회복 할지 알수가 없는 상황입니다.

또한, 박지성 해설위원의 해설가로서의 부진을 어떻게 만회할지도 귀추가 주목되는 상황입니다.

월드컵 일정 및 경기 시간

대한민국 대표팀이 속해 있는 H조의 경기 일정을 살펴보도록 하겠습니다.

우리대표팀은 피파랭킹9위의 포르투갈, 남미의 강호 피파랭킹 14위 우루과이, 아프리카의 복병 가나 와 한 조에 편성되어 있습니다.

H조에 속한 대한민국 대표팀의 자세한 경기 일정은 아래와 같습니다.

날짜경기

11월 24일 16:00 우루과이 vs 대한민국
11월 24일 19:00 포르투갈 vs 가나
11월 28일 16:00 대한민국 vs 가나
11월 28일 22:00 포르투갈 vs 우루과이
12월 02일 18:00 가나 vs 우루과이
12월 02일 18:00 대한민국 vs 포르투갈

대한민국 팀은 2022년 11월 24일 16:00시에 월드컵 첫 경기를 우루과이와 시작합니다.

11월 28일 16:00시에는 2차전을 가나와 치루고, 12월 02일 18:00시에는 조별예선 3차전 포르투갈과의 경기를 하게 됩니다.

대한민국VS우루과이 중계 일정 및 시간

2022카타르월드컵 대한민국vs우루과이는 대한민국의 첫 번째 경기입니다.

우루과이 대표팀은 남미 전통 강팀으로 현재 피파랭킹도 14위에 올라있습니다.

월드컵은 14회 출전하여 그중 2회 우승을 하였습니다.

지난 2010남아공월드컵 16강전에서 우리에게 패배를 안긴 팀입니다.

이번 경기로 대한민국 대표팀은 그 당시 설욕을 갚아줄 수 있는 자리이기도 합니다.

대한민국vs우루과이 경기는 2022년 11월 24일 16:00에 시작합니다.

중계는 대표 방송 3사인 KBS, MBC, KBS 에서 중계합니다.

포르투갈VS가나 중계 일정 및 시간

H조 1위로 유력한 피파랭킹9위 포르투갈의 첫 경기는 피파랭킹 61위의 가나와 합니다.

포르투갈은 세계적인 강팀이며 H조의 강력한 1위로 유력한 팀 입니다.

반면, 가나의 경우 피파랭킹 61위로 전체 참여 국가중 피파랭킹 꼴찌인 61위로 최약체로 평가되고 있습니다.

그래서 왠만하면 포르투갈팀이 가나팀 에게는 승리 할 것으로 보여집니다.

포르투갈vs가나의 경기는 2022년 11월 24일 19:00에 시작합니다.

중계는 대표 방송 3사인 KBS, MBC, KBS 에서 중계합니다.

대한민국VS가나 중계 일정 및 시간

우리나라는 16강을 목표로 하고있지만, 제3국의 시선으로는 대한민국과 가나를 H조 에서 3, 4위를 할 것으로 보고있습니다.

그래서 대한민국 대표팀에게 가나전은 첫 경기 만큼이나 중요한 경기가 되겠습니다.

전력상 대한민국이 유리하다 여겨지지만 방심을 하면 안되는 경기입니다.

대한민국 대표팀의 H조 2차전인 대한민국vs가나의 경기는 2022년 11월 28일 16:00에 시작합니다.

중계는 대표 방송 3사인 KBS, MBC, KBS 에서 중계합니다.

포르투갈VS우루과이 중계 일정 및 시간

H조에서 유력한 16강 후보인 포르투갈과 우루과이는 2차전에서 만나게 됩니다.

두 나라의 16강 진출 여부가 달린 경기가 바로 이 경기가 아닐까 합니다.

바로 이 2차전을 승리하는 팀이 16강에 올라갈 확률이 높은 상황입니다.

객관적 전력상 포르투갈이 많이 우세해 보이지만 우루과이 역시 쉽지 않은 상대입니다.

H조에서 가장 난타전이 예상되는 포르투갈vs우루과이의 경기는 2022년 11월 28일 22:00에 시작 합니다.

중계는 대표 방송 3사인 KBS, MBC, KBS 에서 중계합니다.

가나VS우루과이 중계 일정 및 시간

마지막 3차전인 가나vs우루과이 경기는 2010년 남아공 월드컵 경기의 복수전이 되겠습니다.

당시 가나 대표팀은 우루과이에게 8강에서 만나 패배하여 아프리카 대륙 첫 4강 진출을 눈앞에 두고 탈락 하였습니다.

그때의 기억으로 가나 대표팀은 승리를 위해 만반의 준비를 하고 있을 것 입니다.

다만 객관적 전력으로 우루과이 대표팀이 가나 대표팀 보다는 훨씬 강해 보이는 상황이어서 쉽지 않을 것으로 보여집니다.

H조의 마지막 3차전 경기인 가나vs우루과이의 경기는 2022년 12월 02일 18:00에 시작합니다.

중계는 대표 방송 3사인 KBS, MBC, KBS 에서 중계합니다.

대한민국VS포르투갈 중계 일정 및 시간

대한민국 대표팀의 H조 마지막 3차전 대한민국vs포르투갈의 경기는 양국에 중요한 경기가 되겠습니다.

2002년 월드컵에서 대한민국에게 당한 1패를 설욕하기 위해 포르투갈 팀은 앞선 1,2차전에 승리를 하여 여유가 있더라도 전력을 다 할 것으로 예상됩니다.

대한민국 대표팀도 3차전 까지의 상황이 어떨지 모르는 상황입니다.

만약 16강에 올라가더라도 G조 1위로 유력한 브라질을 피하기 위해서는 반드시 승리해야 하는 경기가 되겠습니다.

대한민국 대표팀의 매우 중요한 H조 3차전 경기인 대한민국vs포르투갈의 경기는 2022년 12월 02일 18:00에 시작합니다.

중계는 대표 방송 3사인 KBS, MBC, KBS 에서 중계합니다.

728x90
728x90

Windows Server 평가판 다운로드 Url

https://www.microsoft.com/ko-kr/evalcenter/evaluate-windows-server-2019?filetype=ISO

728x90
728x90

Function Copy-WithProgress
{
    [CmdletBinding()]
    Param
    (
        [Parameter(Mandatory=$true,
            ValueFromPipelineByPropertyName=$true,
            Position=0)]
        $Source,
        [Parameter(Mandatory=$true,
            ValueFromPipelineByPropertyName=$true,
            Position=0)]
        $Destination
    )

    $Source=$Source.tolower()
#    $Filelist=Get-Childitem "$Source" –Recurse   -- 대상 폴더안의 파일 및 폴더 전체를 리스트함.
    $Filelist=Get-Childitem 파일명
    $Total=$Filelist.count
    $Position=0


    foreach ($File in $Filelist)
    {
        $Filename=$File.Fullname.tolower().replace($Source,'')
        #$Filename= 파일명
        $DestinationFile=($Destination+$Filename)
        Write-Progress -Activity "Copying data from '$source' to '$Destination'" -Status "Copying File $Filename" -PercentComplete (($Position/$total)*100)
        Copy-Item $File.FullName -Destination $DestinationFile
        $Position++
    }
}

$src="c:\temp"
$dest="C:\Temp\download"

Copy-WithProgress -Source $src -Destination $dest

#복사 완료 후 제거 
Remove-Item c:\temp\sw_dvd5_office_professional_plus_2016_64bit_korean_mlf.iso -Force  

728x90
728x90

MSSQL에서는 날짜를 여러가지형태로 가공할 수 있는 함수들을 많이 제공하고 있습니다.

이번 포스팅에서는 대표적인 날짜함수(GETDATE,DATEADD,DATEPART,DATEDIFF)의 사용법에 대해서 알아보도록 하겠습니다.


GETDATE 

GETDATE함수는 현재 컴퓨터에 설정되어있는 시스템 시간을 불러와주는 함수입니다.

2018-03-31 오전 01:40:30 

위와같이 GETDATE()함수는 년월일은 물론이거니와 분,초 까지도 구해줍니다.

하지만 모든 사용자들이 위와같은 형식으로 사용하지는 않겠죠.

여기서 우리는 우리가 표시할 시간이나 날짜만 적절히 뽑아 올 수도 있고

날짜 형태를 바꿔서 출력할수도 있습니다.


사용법

--현재 날짜 출력--

SELECT GETDATE() AS 시스템일자

--현재 날짜의 연,월,일 출력--

SELECT YEAR(GETDATE()) AS 년,

MONTH(GETDATE()) AS 월,

DAY(GETDATE()) AS

출력 포맷 변경

--YYYY/MM/DD--

Select Convert(varchar(10),Getdate(),111)

--YYYYMMDD--

Select Convert(varchar(10),Getdate(),112)

--HH:MM:SS--

Select Convert(varchar(8),Getdate(),108)

--HH:MM:SS:mmm--

Select Convert(varchar(12),Getdate(),114)

--HHMMSS--

Select Replace(Convert(varchar(8),Getdate(),108),':','')

--HHMMSSmmm--

Select Replace(Convert(varchar(12),Getdate(),114),':','')

--YYYY/MM/DD HH:MM:SS--

Select Replace(Convert(varchar(30),Getdate(),120),'-','/')

--YYYY/MM/DD HH:MM:SS--

Select Replace(Convert(varchar(30),Getdate(),121),'-','/')

--YYYY/MM/DD HH:MM:SS--

Select Convert(varchar(10),Getdate(),111) + Space(1) + Convert(varchar(8),Getdate(),108)

--YYYYMMDDHHMMSS--

Select Convert(varchar(10),Getdate(),112) + Replace(Convert(varchar(8),Getdate(),108),':','')


DATEADD 

DATEADD함수는 날짜에 원하는 일수를 더해서 출력해주는 함수입니다.

100일뒤에는 몇일이다 이런것은 쉽게 계산하기 힘든데

DATEADD함수를 쓰면 이런것들을 편리하게 계산할 수 있습니다.

이 함수를 좀 더 응용하면 100일 뒤에는 무슨 요일이다 이렇게도 응용가능합니다.


사용법

--2개월 후 출력--

SELECT DATEADD(MM,2,GETDATE()) AS '2개월후'

--30일전 출력--

SELECT CONVERT(NVARCHAR(8),DATEADD(DAY,-30,'20180124'),112)AS '30일전'

--1달 뒤 요일계산

SELECT DATENAME(WEEKDAY,DATEADD(MM,1,GETDATE())) AS'요일계산'


DATEPART 

DATEPART함수는 날짜에서 지정한 날짜형식의 부분만 출력해주는 함수입니다.

아주 다양하게 활용이 가능한 함수입니다.


사용법

--현재 년도 구하기

SELECT DATEPART(YEAR,GETDATE());

--현재 월 구하기--

SELECT DATEPART(MONTH,GETDATE())

--현재 일 구하기--

SELECT DATEPART(DAY,GETDATE())

--현재 분기 구하기--

SELECT DATEPART(QQ,GETDATE())

--올해의 몇번째 날인지 구하기--

SELECT DATEPART(DAYOFYEAR,GETDATE())

--올해의 몇째 주인지 구하기--

SELECT DATEPART(WEEK,GETDATE())

--이번주의 몇번째 날인지 구하기--

SELECT DATEPART(WEEKDAY,GETDATE())

--오늘이 무슨요일인지 구하기--

SELECT

CASE DATEPART(WEEKDAY, GETDATE())

WHEN '1' THEN '일요일'

WHEN '2' THEN '월요일'

WHEN '3' THEN '화요일'

WHEN '4' THEN '수요일'

WHEN '5' THEN '목요일'

WHEN '6' THEN '금요일'

ELSE '토요일'

END AS '요일'


DATEDIFF 

DATEDIFF함수는 지정한 두 날자간의 간격을 계산해주는 함수입니다.

정해준 날짜형식에 맞춰 리턴값이 다르므로 적절하게 잘 설정해주셔야 합니다.


사용법

--지정일과의 현재와의 년도차이 계산--

SELECT DATEDIFF(YY,'2000-01-01',GETDATE())

--지정일과의 현재와의 월차이 계산--

SELECT DATEDIFF(MM,'2000-01-01',GETDATE())

--지정일과 현재와의 일차이 계산--

SELECT DATEDIFF(DD,'2000-01-01',GETDATE())


728x90
728x90

데이터베이스를 사용하다보면 테이블안에있는 데이터의 특정 문자들만 치환 해줘야 하는 일이 생깁니다. 이번 포스팅에서는 특정 문자열을 바꿔주는 REPLACE함수와 STUFF함수에 대해서 알아보도록 하겠습니다.


REPLACE

지정된 문자열 값을 특정 문자열로 바꿔주는 함수입니다.


사용법

--문법--

REPLACE('문자열','치환예정문자','치환할문자')

--예시--

REPLACE('ABCDEFG','DEF','XXX')

예제

--MY_TABLE에서 이름(NM_KOR)을 이씨를 김씨으로 바꿔서 출력--

SELECT REPLACE(NM_KOR,'이','김')AS 사원명 FROM MY_TABLE


STUFF

지정된 문자열의 시작위치와 크기를 지정하여 원하는 문자로 치환하는 함수입니다.


사용법

--문법--

STUFF('문자열','시작위치','크기','치환할문자')

--예시--

STUFF('ABCDEFG',2,3,'XXX')

예제

--MY_TABLE에서 이름(NM_KOR)칼럼의 이순신을 이성계로 바꿔서 출력--

SELECT STUFF(NM_KOR,2,2,'성계')AS 사원명 FROM MY_TABLE

728x90

+ Recent posts