* 제약사항
- Azure AD 인증은 OpenVPN 프로토콜에 대해서만 지원합니다.
- Azure AD 인증 VPN 클라이언트는 Windows 10만 지원합니다.
* 사전준비
- Azure AD 테넌트가 있어야 하며, Azure AD의 전역 관리자(Global Admin) 권한이 필요합니다.
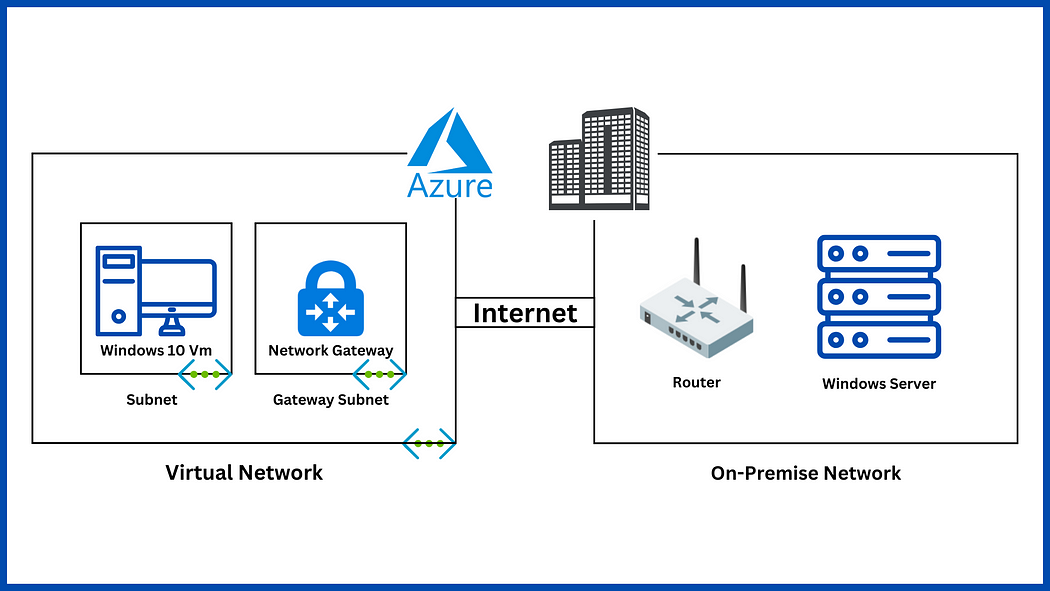
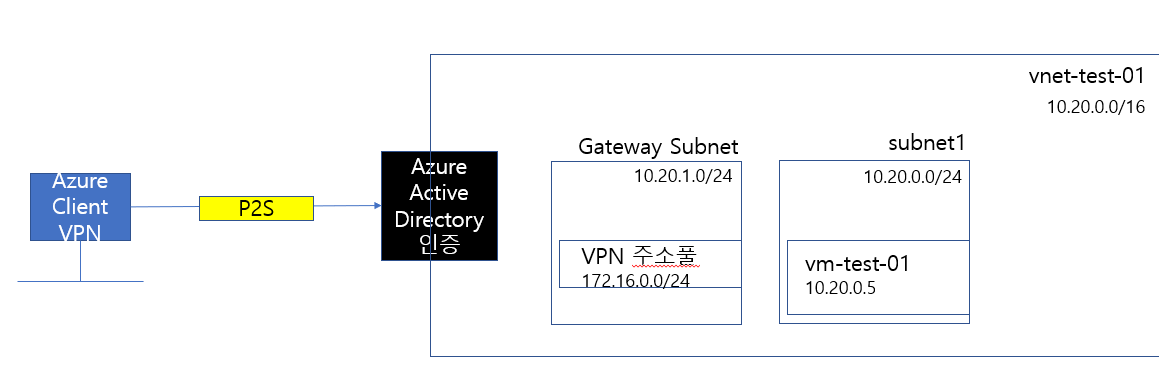
- 네트워크 구성도는 아래와 같이 구성한 상태에서 VPN Gateway에 Azure AD 인증을 추가해보도록 하겠습니다.
* 실습요약
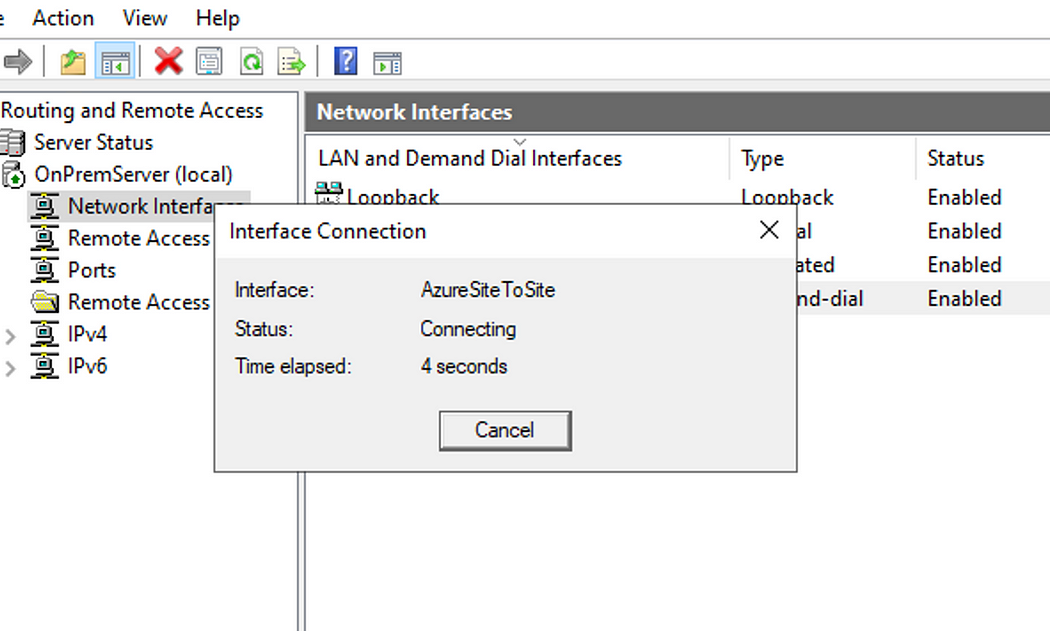
1. VPN Gateway에서 Azure AD 인증 사용 설정
2. Point to Site VPN Gateway 설정
3. 사용자 PC에 VPN Client 설치
1. VPN Gateway에서 Azure AD 인증 사용 설정
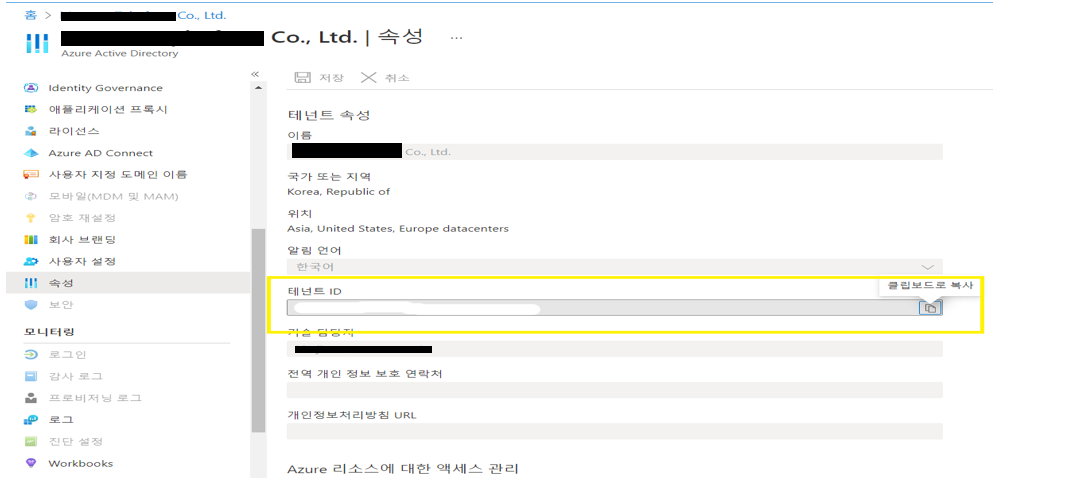
Azure AD의 테넌트 ID를 복사합니다.
| https://login.microsoftonline.com/common/oauth2/authorize?client_id=41b23e61-6c1e-4545-b367-cd054e0ed4b4&response_type=code&redirect_uri=https://portal.azure.com&nonce=1234&prompt=admin_consent |
위 링크의 'common' 부분을 위에서 복사한 '테넌트 ID'로 바꾸고 브라우저에 붙여 넣습니다.
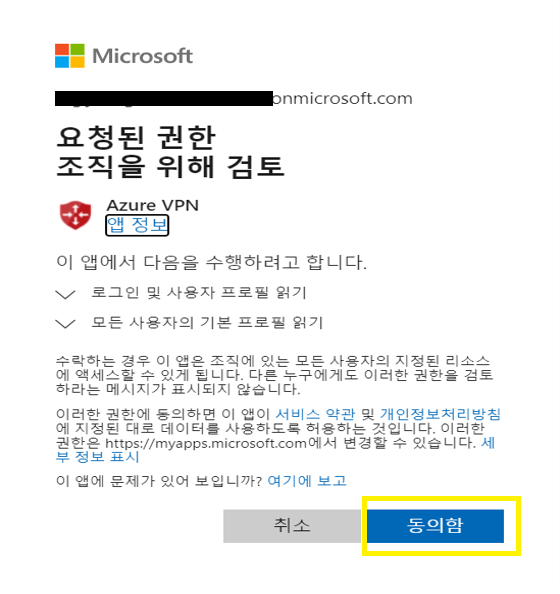
링크를 통해 접속했을 때, Azure AD ‘전역 관리자‘ 계정으로 로그인하여 Azure VPN 앱에 대한 접속을 허용해줍니다.
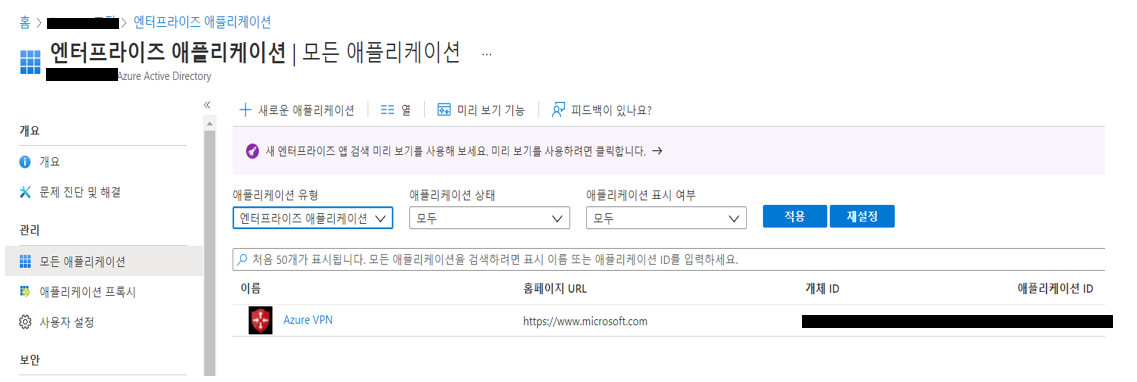
Azure AD > 엔터프라이즈 애플리케이션을 확인했을 때, Azure VPN이 추가된 것을 확인할 수 있습니다.
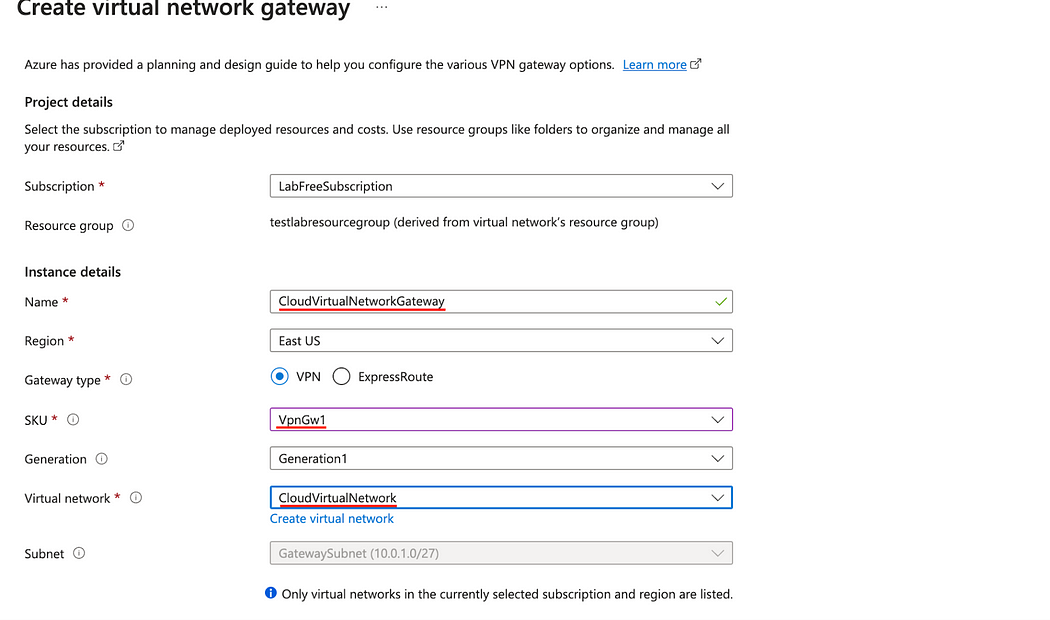
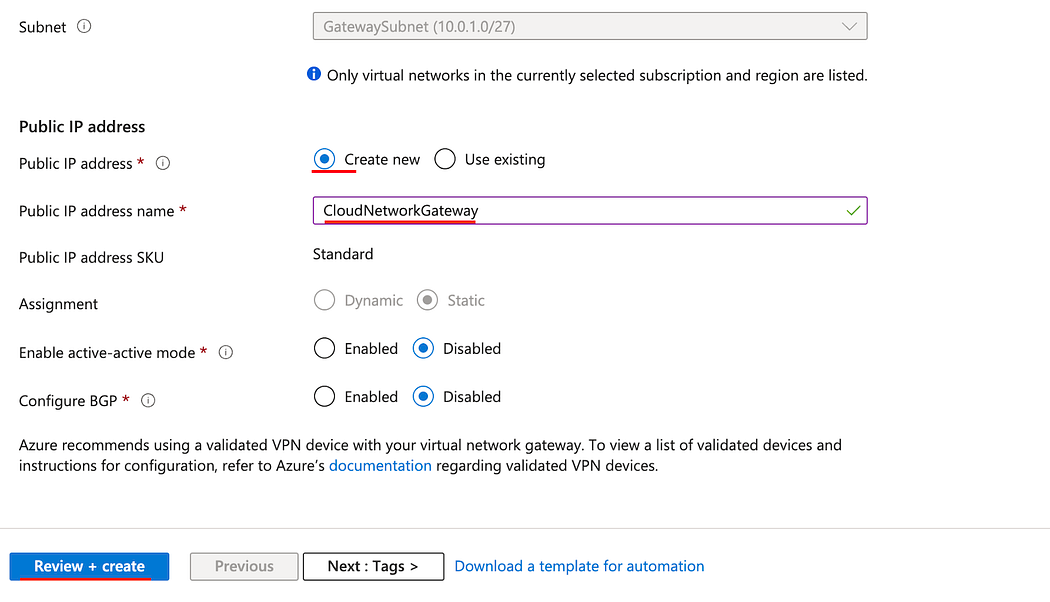
2. Point to Site VPN Gateway 설정
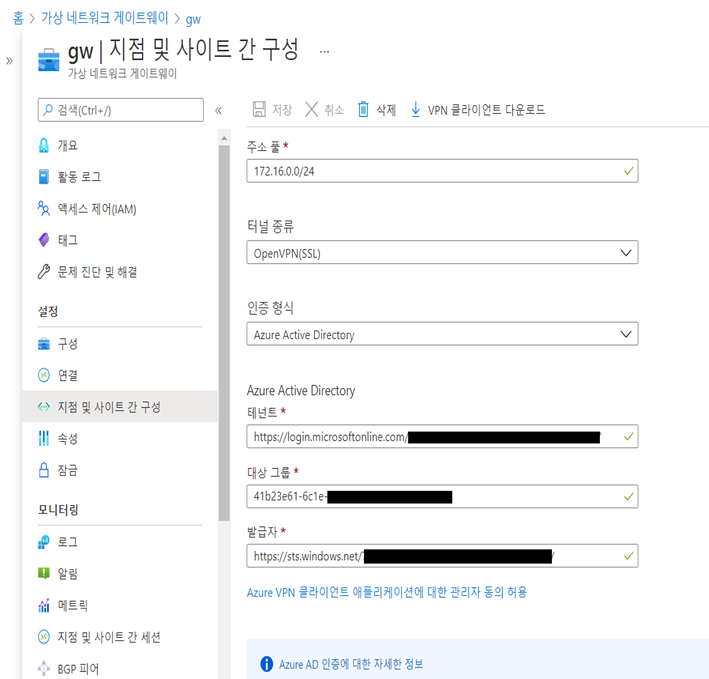
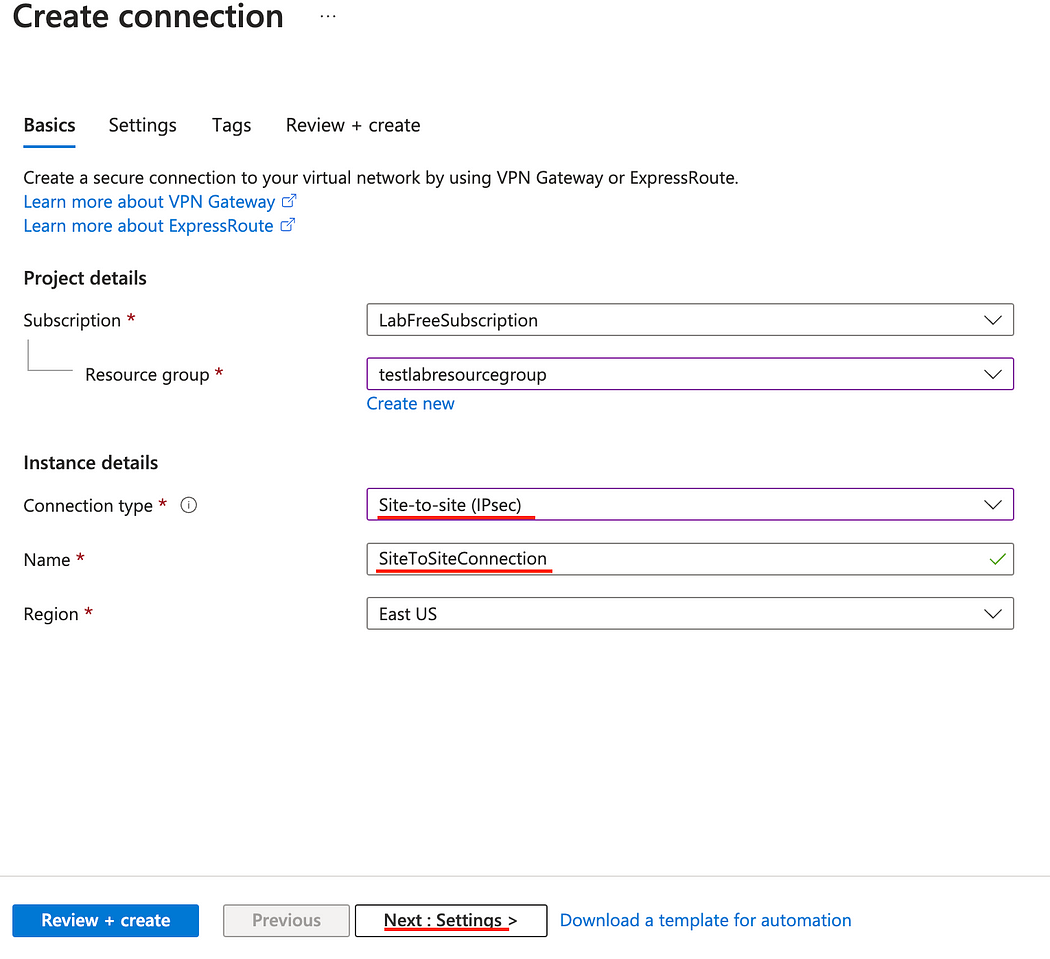
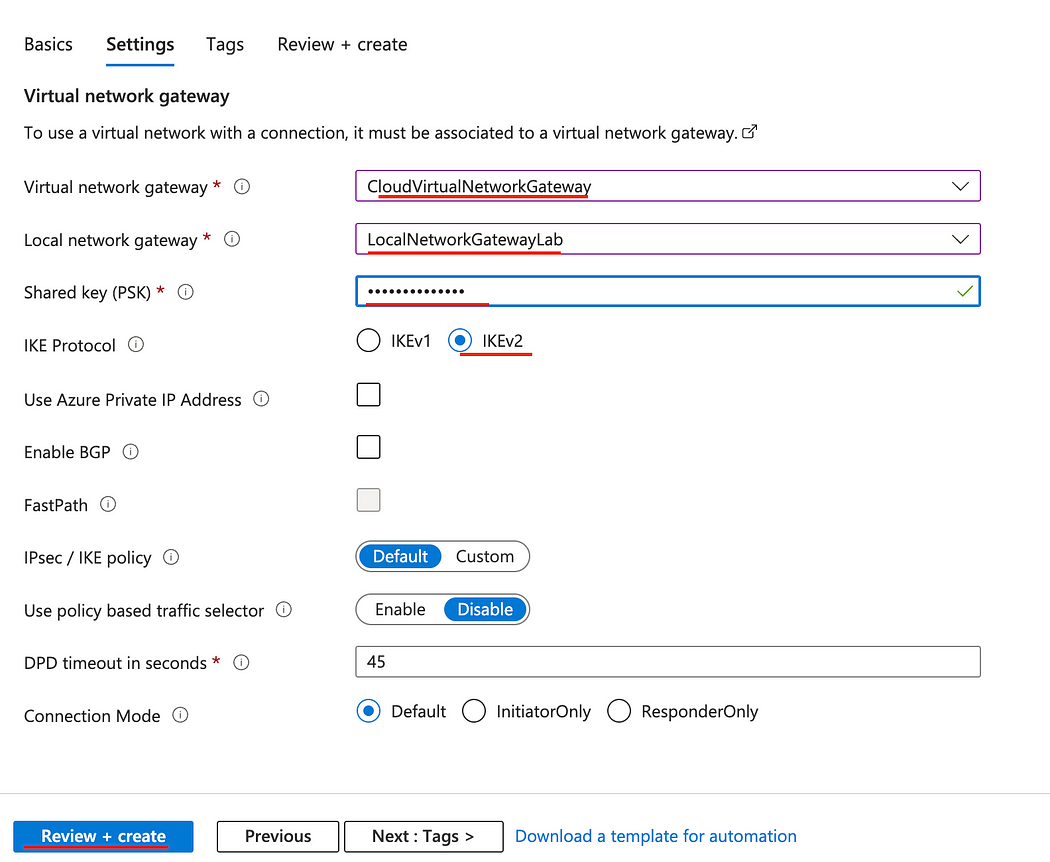
VPN Gateway > 지점 및 사이트 간 구성 > Configure now를 클릭하여 설정값을 입력합니다.
* 주소 풀 : VPN Client가 사용할 IP 주소 풀
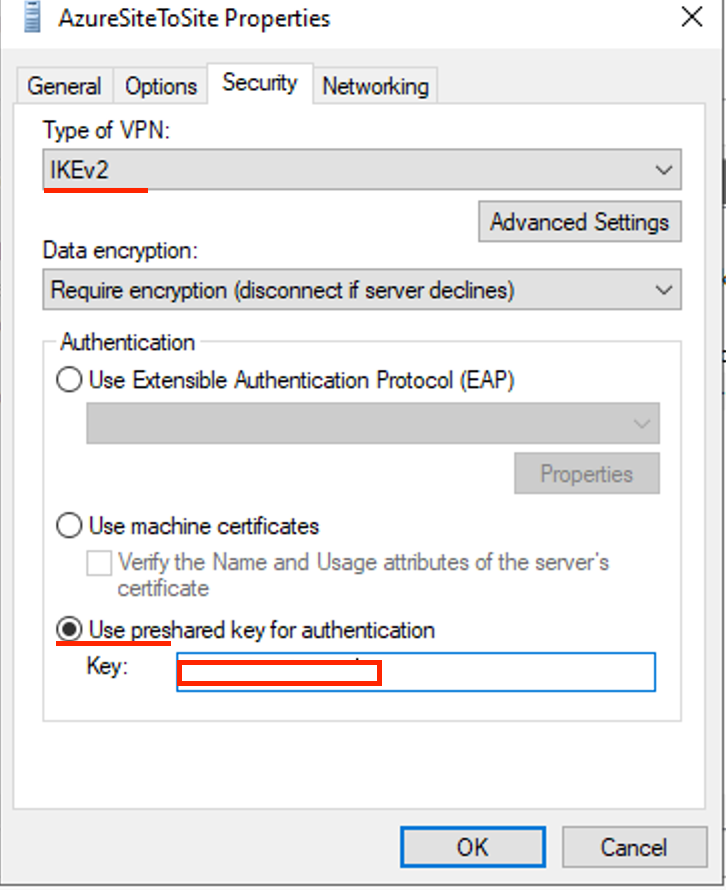
* 터널 종류 : OpenVPN(SSL)
* 인증 형식 : Azure Active Directory
* 테넌트 : https://login.microsoftonline.com/[AzureAD TenantID]/
* 대상 그룹 : Azure VPN Enterprise Application ID
* 발급자 : https://sts.windows.net/[AzureAD TenantID]/
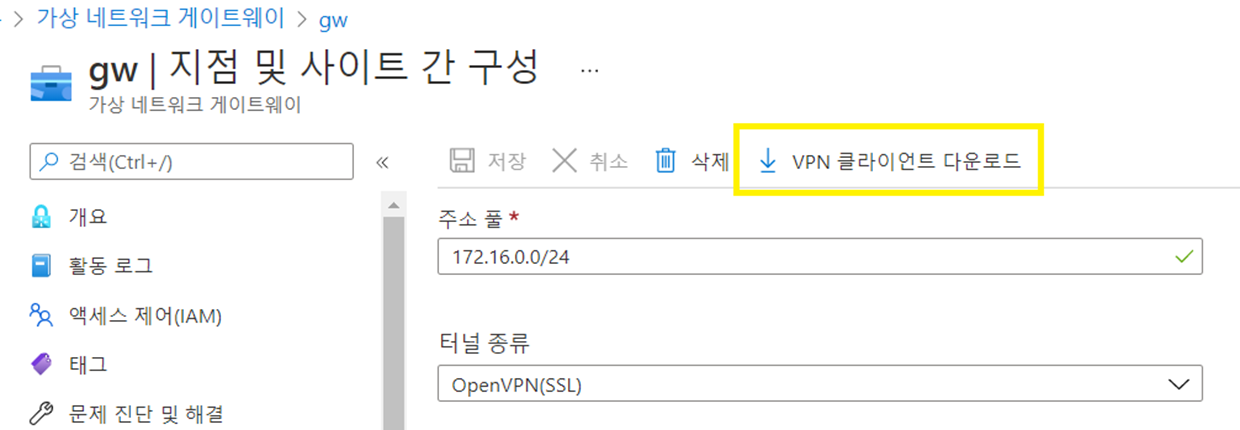
설정이 완료되었으면 저장 후, ‘VPN 클라이언트 다운로드’ 를 클릭합니다.
(zip파일이 다운로드 됩니다.)

압축파일을 해제하고 AzureVPN 폴더를 보면 azurevpnconfig.xml 파일이 보입니다.
Azurevpnconfig.xml 파일은 VPN Client 프로필 파일로, VPN 연결에 대한 설정이 포함되어 있으며 Azure VPN 클라이언트 애플리케이션으로 정보를 직접 가져올 수 있습니다.
3. 사용자 PC에 VPN Client 설치
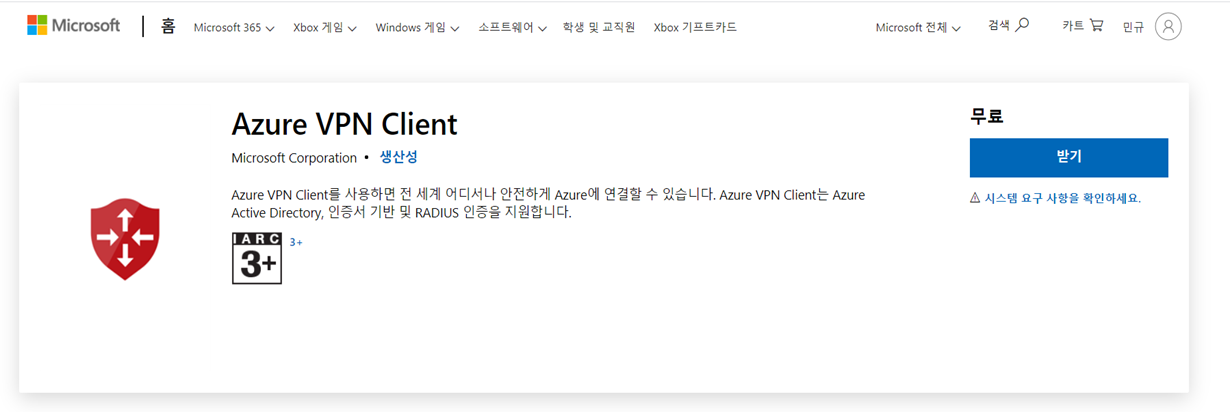
아래 링크에 접속하여 사용자의 PC에 VPN Client 설치 파일을 다운로드합니다.
https://go.microsoft.com/fwlink/?linkid=2117554
Get Azure VPN Client - Microsoft Store
The Azure VPN Client lets you connect to Azure securely from anywhere in the world. It supports Azure Active Directory, certificate-based and RADIUS authentication.
www.microsoft.com
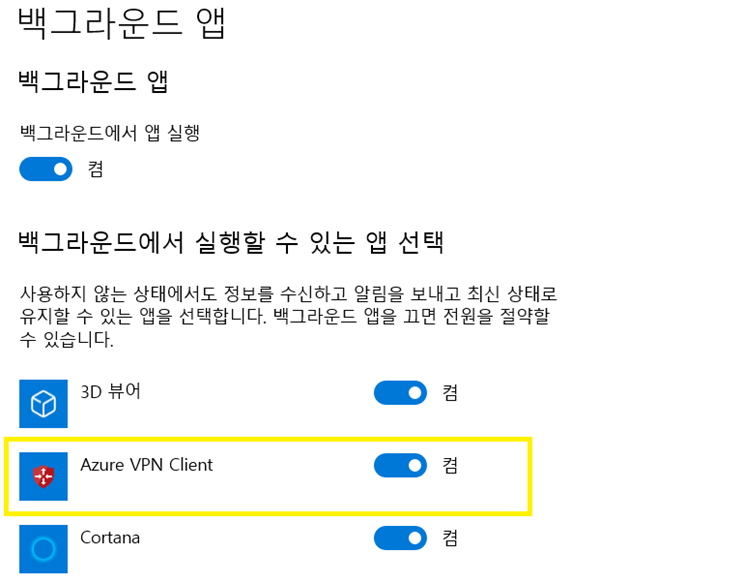
Windows 검색창에서 ‘백그라운드 앱’ 을 실행하여 백그라운드 앱 실행과 Azure VPN Client가 켜져있는지 확인합니다.
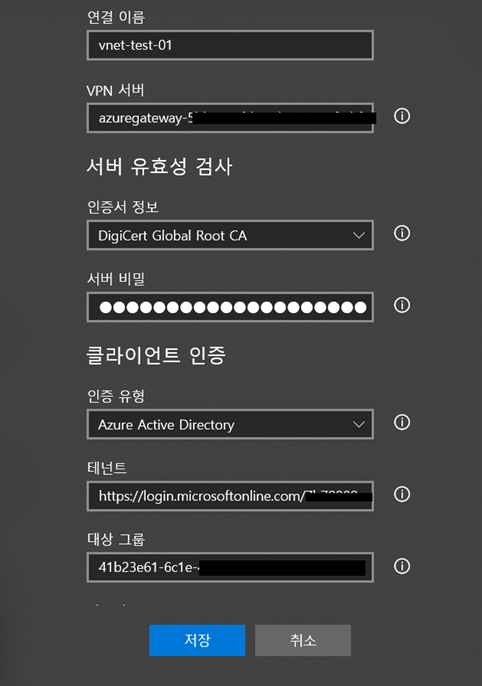
Azure VPN Client 앱을 실행하여 좌측 하단에 ‘+’ 을 클릭하여 ‘가져오기‘ 를 클릭합니다.
Azurevpnconfig.xml 파일을 선택하여 열어주면 사진과 같이 입력했던 정보가 자동으로 입력됩니다.
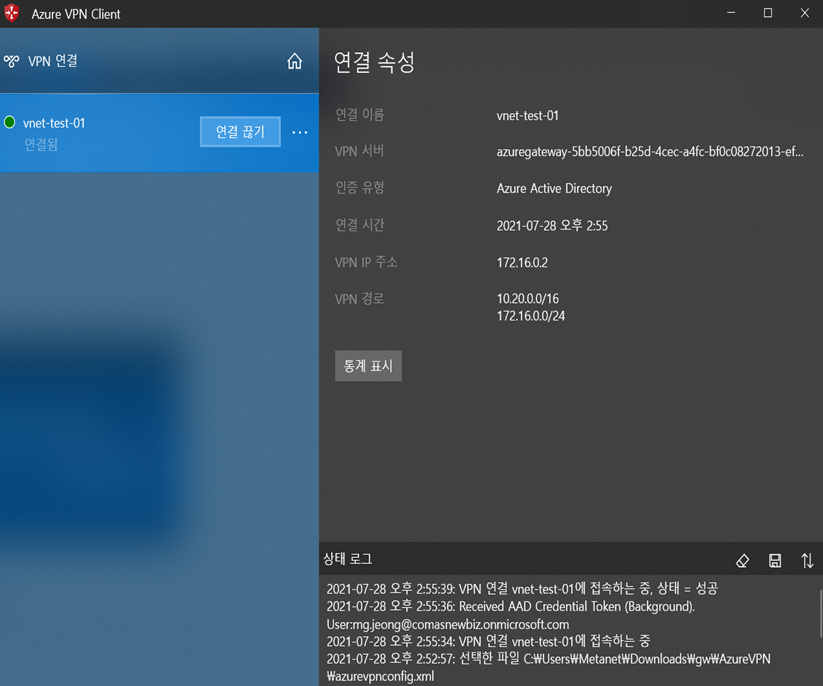
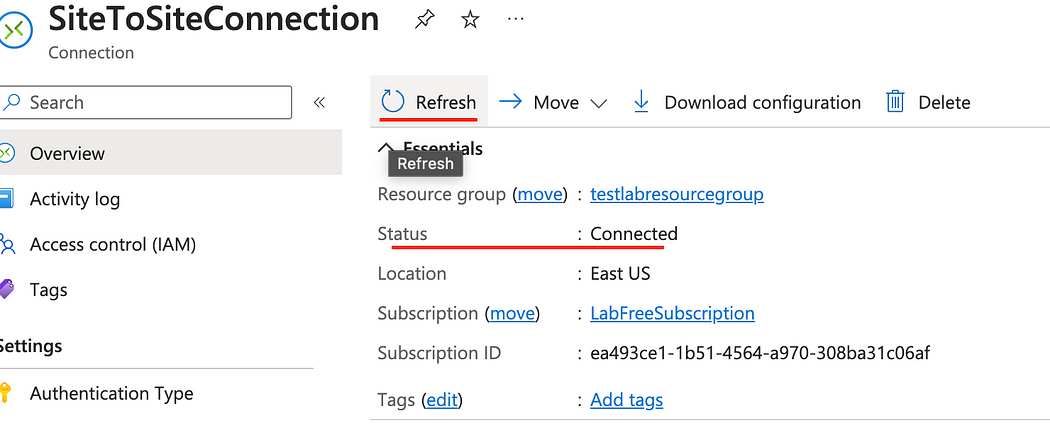
VPN 연결에 성공했습니다.
로그인의 경우 Azure AD에 등록된 계정을 사용하여 로그인합니다
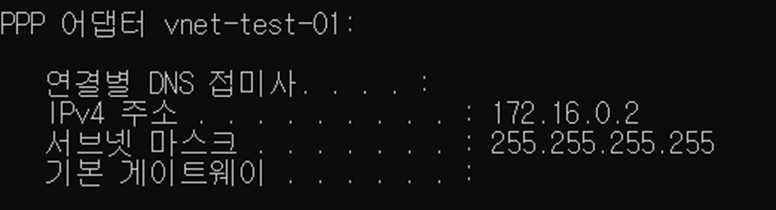
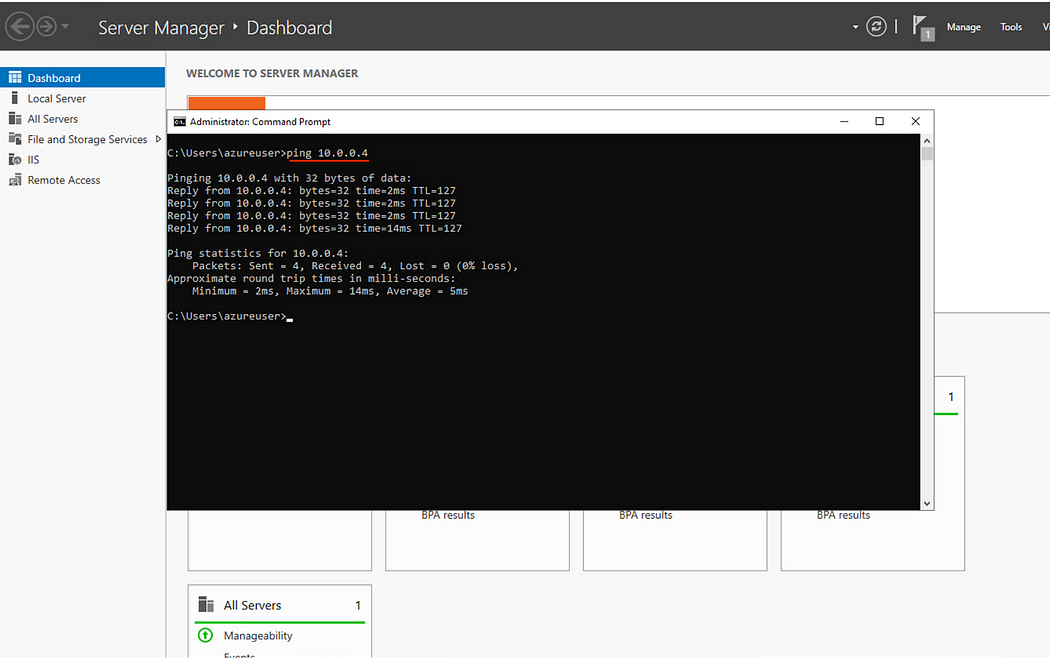
실제로 Client PC의 네트워크 주소를 확인해보면 가상 네트워크 게이트웨이의 주소 풀을 사용하는 것을 확인할 수 있습니다.
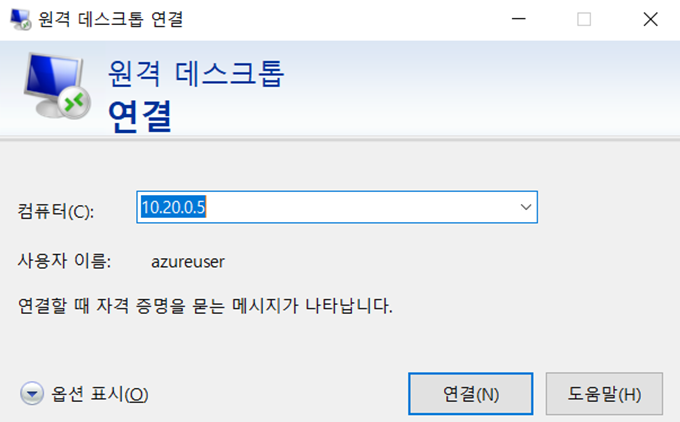
Azure VM의 사설 IP주소로 RDP를 통해 연결해보겠습니다.
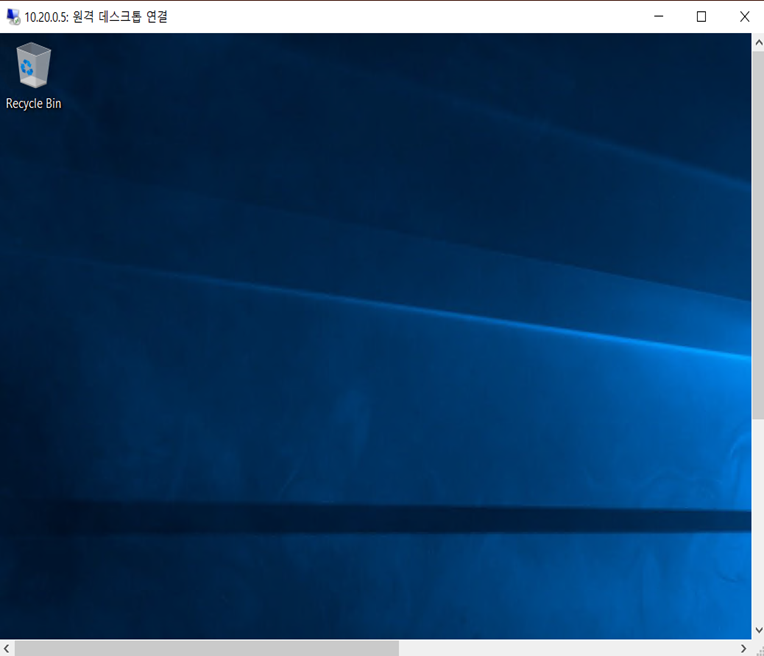
성공적으로 연결이 되었습니다.
'IT이야기 > Azure' 카테고리의 다른 글
| 마이그레이션을 위한 Azure VMware 솔루션 노드 크기 조정 방법 (1) | 2024.12.31 |
|---|---|
| Peering with Gateway Transit (0) | 2024.12.27 |
| VPN Gateway를 이용한 Vnet-to-Vnet 구성 (1) | 2024.12.27 |
| Azure VMware Solution (AVS) Migration and Capacity Planning using Azure Migrate Server Assessment (0) | 2024.12.24 |
| Azure VMware Solution (AVS) integration with Azure Application Gateway (0) | 2024.12.24 |